
Event log
The event log is intended for events that cannot be classified as data breaches, but which you still want to have documented in the portal. Below we will review how to create and customize the form for creating new events in the event log.
How to create or edit an incident in the event log
To create a new incident in the Event log, click on “Create log entry” (1) and a form will open. To edit an event that has already been created, click the edit icon (2).

The form for creating event entry
When clicking on “create event entry” a form will open. The form is by default very simple, which you will be able to see in the picture below, but it’s possible for you to customize the form, with the different elements you want to register with each incident. Further down on this page, we will go through how to customize the form.
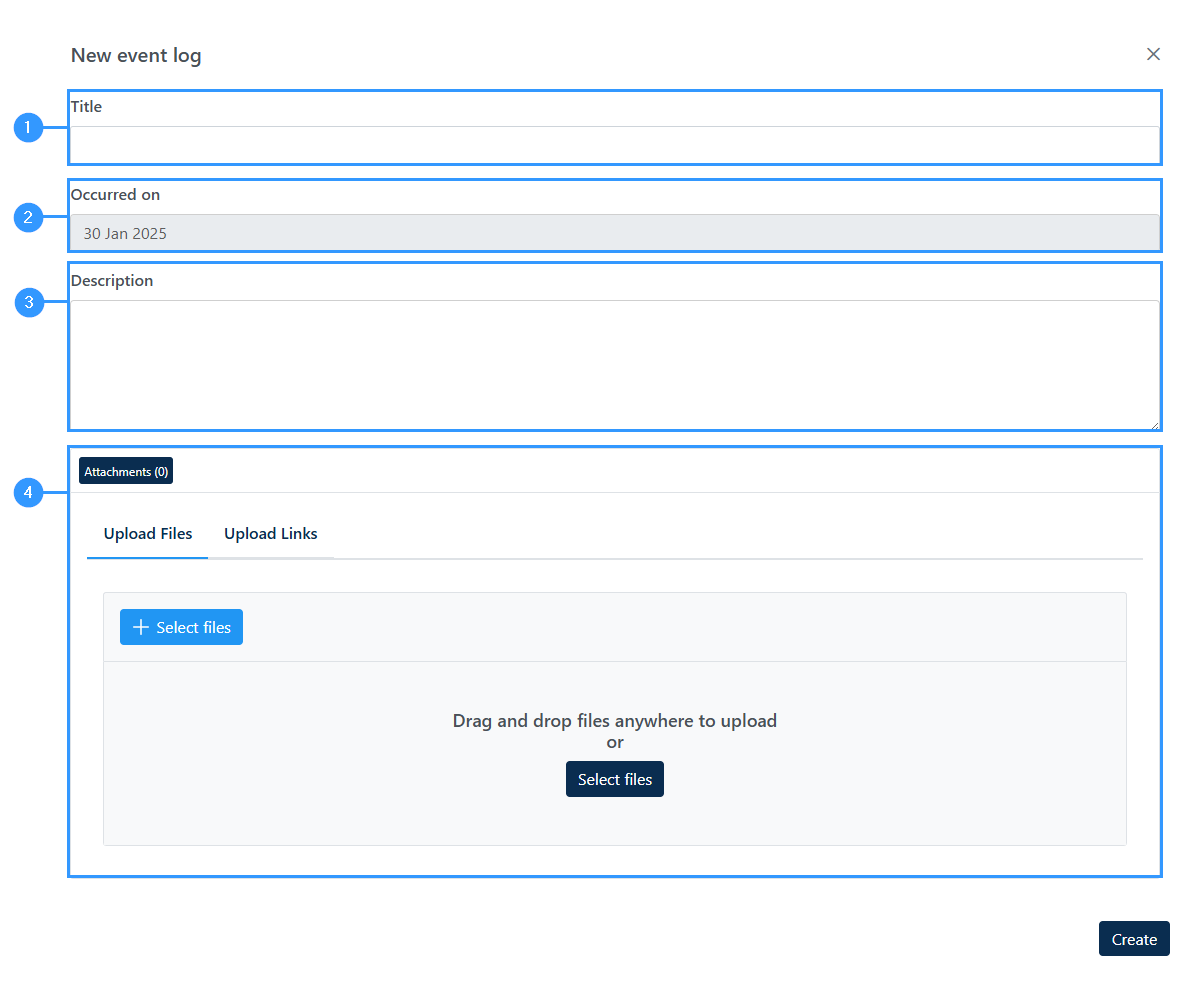
1. Title
-In this field you must enter a title for the incident that you want to create. The title will be shown in the overview, as well as a short part of the description you provide further down. Therefore, choose a title by which you can recognize the incident.
2. Occured on
-This field is for registering the time the incident occurred on. Click on the field with the date from which you can select the correct date for the event.
3. Description
-Here you should insert the description of the incident. If you do not choose to customize the form with extra more specific fields, everything necessary to include will have to be entered here.
4. Attachments
If you have any files to attach, this is where you do it.
Where to customize the event log
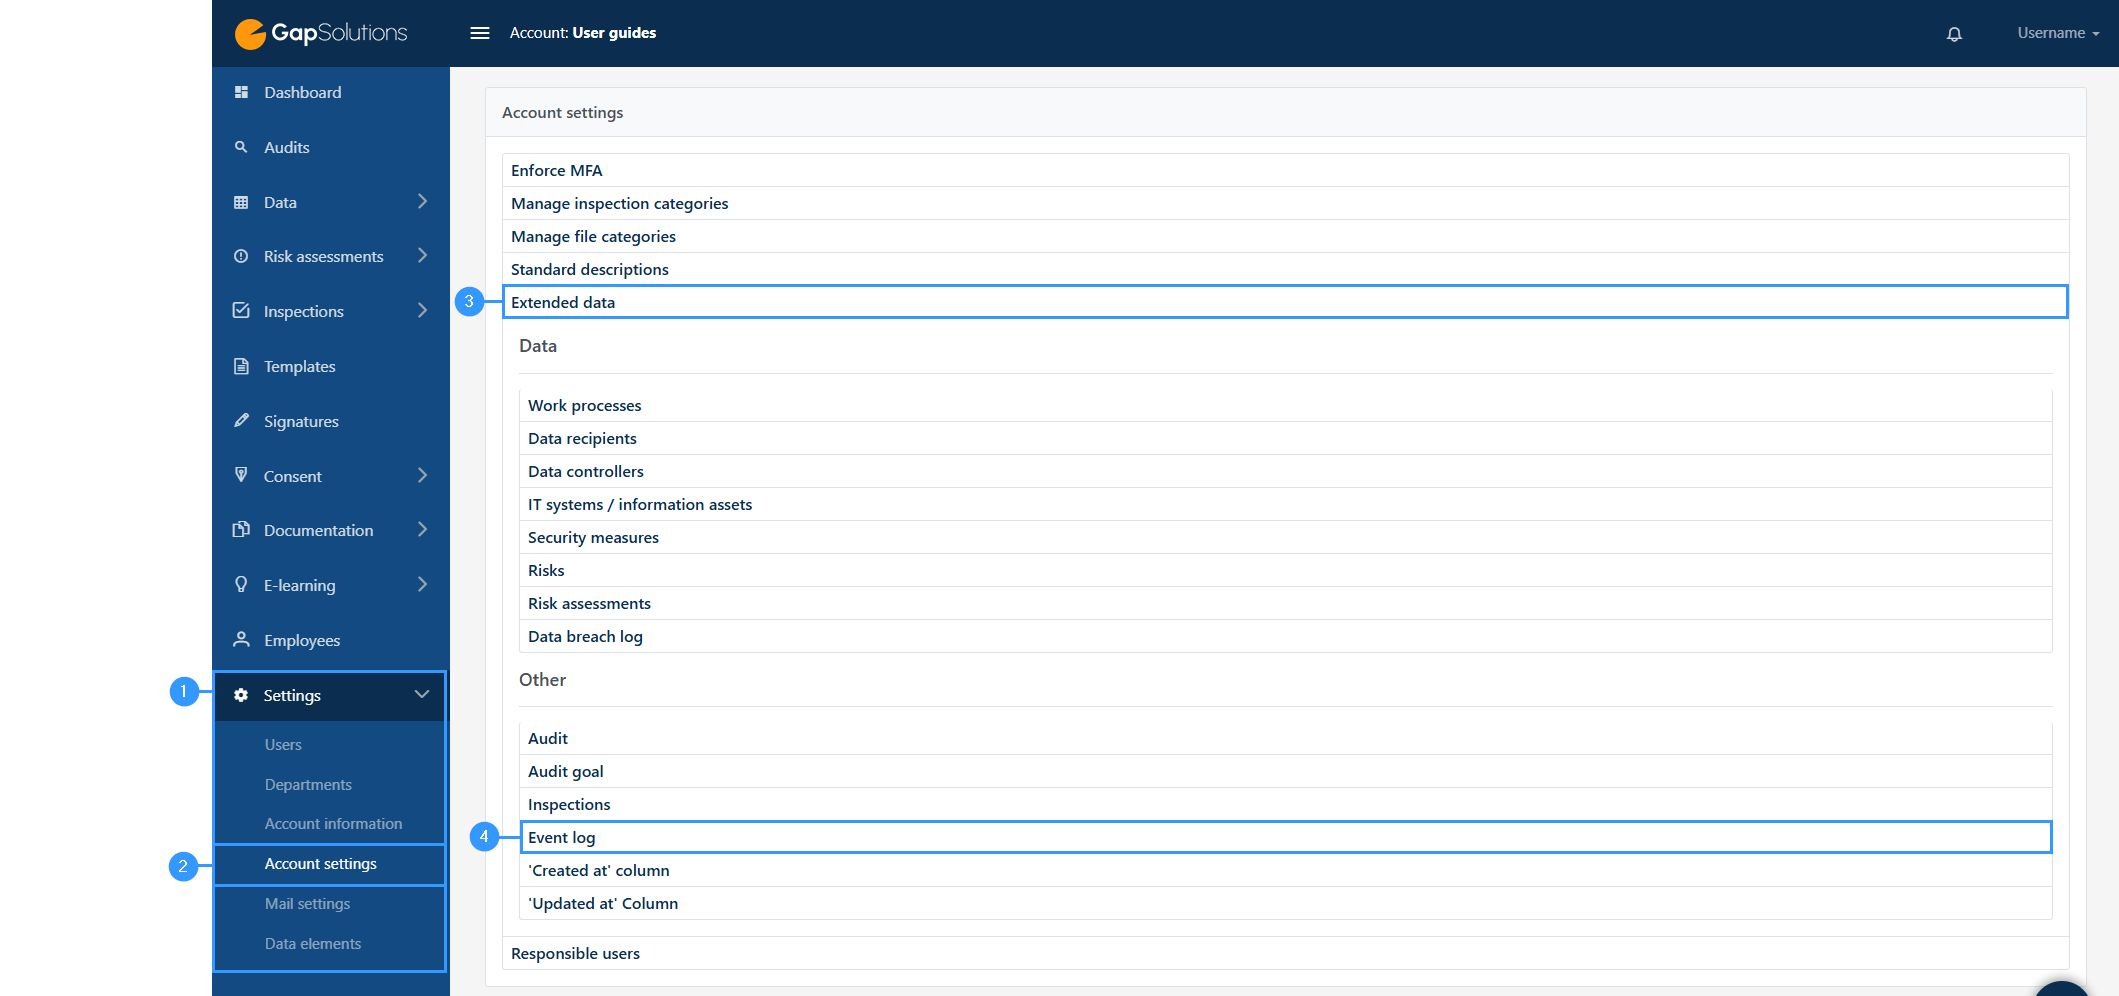
1. Settings
-If you wish to customize the log entries form, you do so by clicking on “settings” on the left side of the menu bar.
2. Account settings
-This will unfold several sub-items under settings, where you need to select “account settings”.
3. Extended data
-Once inside account settings, unfold the bar “extended data”
4. Event log
-There will be a bar called “event log” which you need to click on.
How to customize the event log
Once you are inside settings and have clicked on “Event log” the bar will unfold, and it will look like this:

1. Enable custom fields
-At first, this part will be the only thing visible when the bar unfolds. You need to click on the icon to the right, in order to enable custom fields. The deafult setting is, that the icon is toggled off. When toggling the icon on, the elements below will show.
2. Costum
-When having enabled custom fields, you will be able to see this bar. Click on the bar to unfold and see item 3, showed in the picture.
3. Name
-This is where you can add new fields to the form, for when creating an event entry. Click on the icon “add” to the right, and you will open the following window:
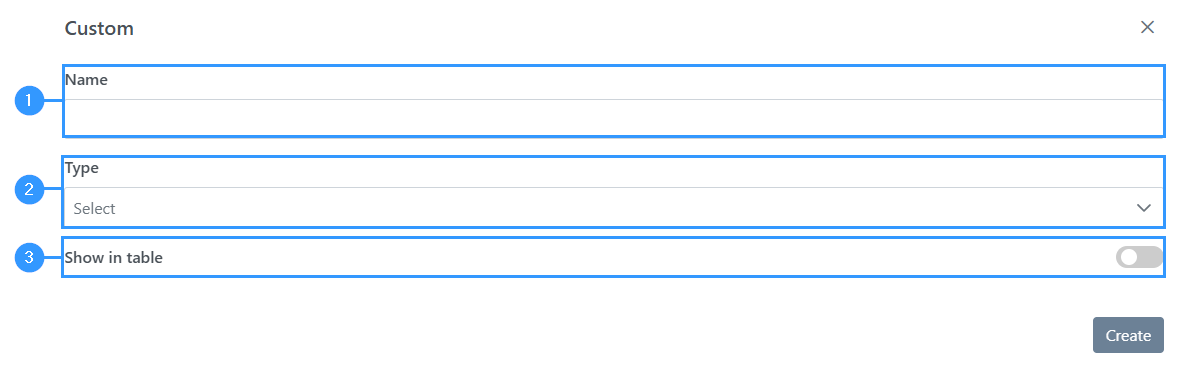
1. Name
-Here you must enter a name for the field that you want to create. The name will appear at the top of the field.
2. Type
-To select the type of field you want to create, click on this field. This will open some different options where you can choose from: Text, text area, rich text area, select, drop down (multi option), and toggle.
3. Show in table
-This setting is for choosing whether the customized field should be visible in the table also referred to as the overview. This means that the name of the field will become a heading in a column in the overview, from which you will be able to see what is filled in the field in the overview.
Adresse
GapSolutions A/S
Uraniavej 6
DK-8700 Horsens
CVR
CVR-nr. 38582356
Telefon
Salg & administration
(+45) 8844 0808
Helpline & konsulenter
(+45) 2199 0808
E-mail
Kontakt@gapsolutions.dk
Support@gapsolutions.dk
Vi bruger udelukkende tekniske cookies på vores hjemmeside. For yderligere information se vores Cookiepolitik.
Vi er ISO 27001-certificeret og ISAE 3000-auditeret.