
Data
When clicking on ‘Data’ in the bar to the left on the Dashboard, following options will be shown:
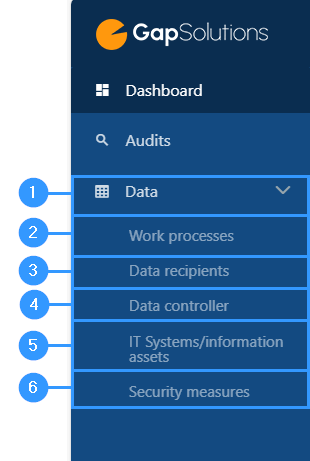
- Work processes
-In GDPR-context work processes are processes in which dealing with personal data is incorporated into. In this module you can edit existing and create new work processes. - Data recipients
-A data recipient is a legal or physical person, a public authority, an institution, or another organ to which personal data is disclosed to. This could be anything from your bank to Microsoft Office etc. In this module you will be able to edit existing and create new data recipients. - Data controller
-A data controller is a company / legal entity, which decides the purpose, extent, and method of processing personal data. In this module you will be able to edit existing and create new data controllers. - IT Systems / information assets
-IT Systems / information assets are programs and assets which includes information. This could be software as well as physical subjects as laptops, external hard discs etc. In this module you will be able to edit existing and create new IT Systems / information assets in the portal. - Security measures
-Security measures are actions and systems, that help ensure the security of processing and storing personal data. In this module you will be able to find an overview of existing security measures, editing in these and create new security measures.
Navigation to the different elements under data
The setup of the tables in all sub-items of data is streamlined, and you navigate in the same way in all tables belonging to the menu item data.
The review below will be based on work processes, but you navigate in the same way in data recipient, data controller, IT systems / information assets as well as security measures.
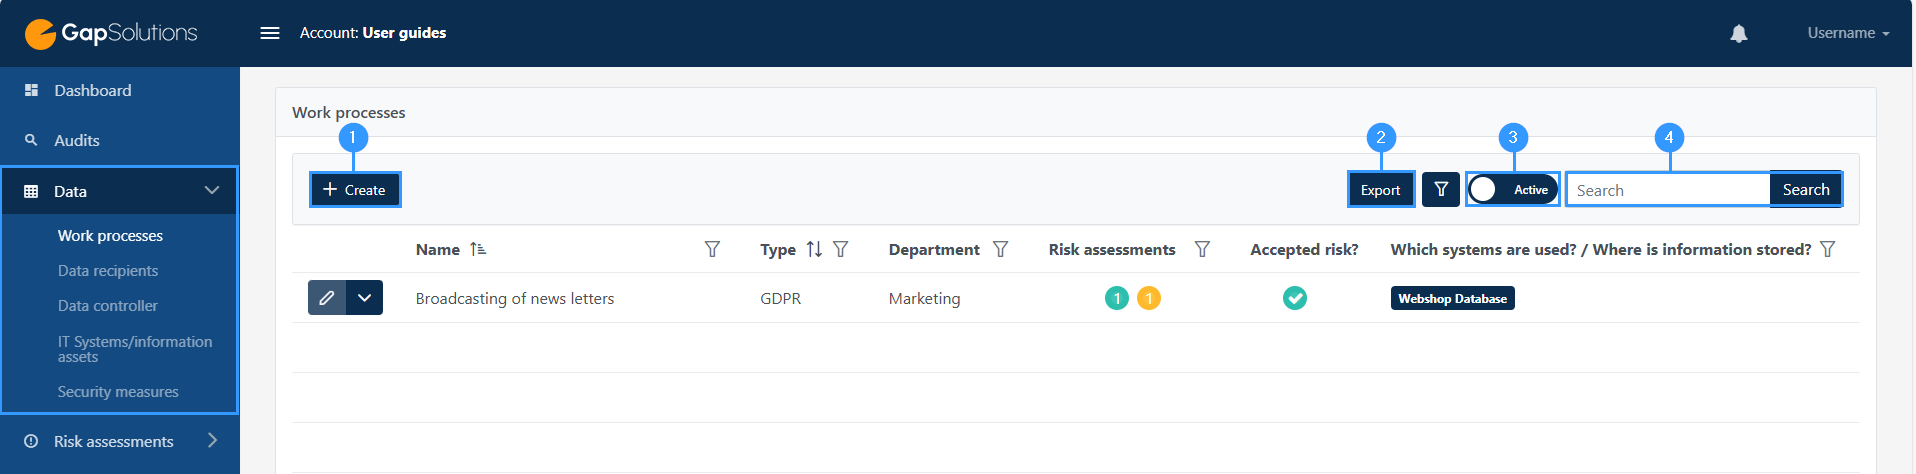
1. Create
-When you want to create a new work process, data recipient, data controller, IT system / information asset or security measure click on this button. The button will appear in the same place in all views but be aware that you must have selected the sub-item in the menu bar to which you want to create something new. Based on the example above, you want to create a new work process. If you want to create a new security measure, click on security measures in the menu to the right, after which the “create” button will be in the same place.
2. Export
-Here it is possible to export the elements. When you click export, you will download an Excel-file with the items that you exported. When exporting via this button, you will export the full overview.
3. Active/archived items
-By this icon, you can choose whether you want to display the active items, as in the example above, or archived items.
4. Search function
-Here you can search for the various working processes.When you need to see specific work processes, data recipients, data controllers, IT systems / information assets or security measures, you can sort and filter, thereby specifying what you want to see.
Sorting and filtering in columns
When you need to see specific work processes, data recipients, data controllers, IT systems / information assets or security measures, you can sort and filter, thereby specifying what you want to see. This also allows you to search for specific elements using the features discussed below:
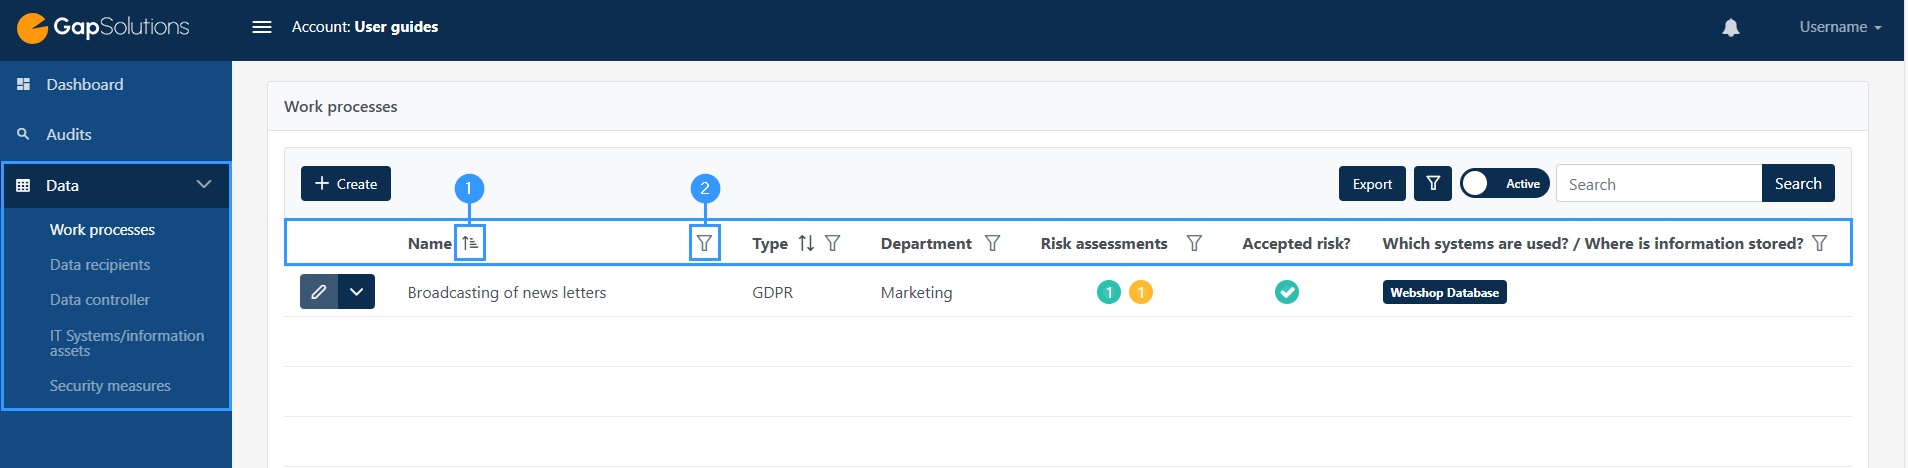
1. ↑↓
-This icon won’t appear next to all columns in the list, so you’ll only be able to sort based on the columns where the icon is available. The sorting is based on alphabetical order. As a starting point, the overview is displayed in alphabetical order starting from a. When you click on the icon for the first time, the option will continue to start from a, after which you will see one arrow pointing up. When you click the icon again, the arrow will instead turn down and the items will appear from the back of the alphabet.
2. Ȳ
-When clicking on this funnel it opens a small window where it is possible to search by word.
Edit and function menu
For all items under data, there will be an edit icon and a function menu.
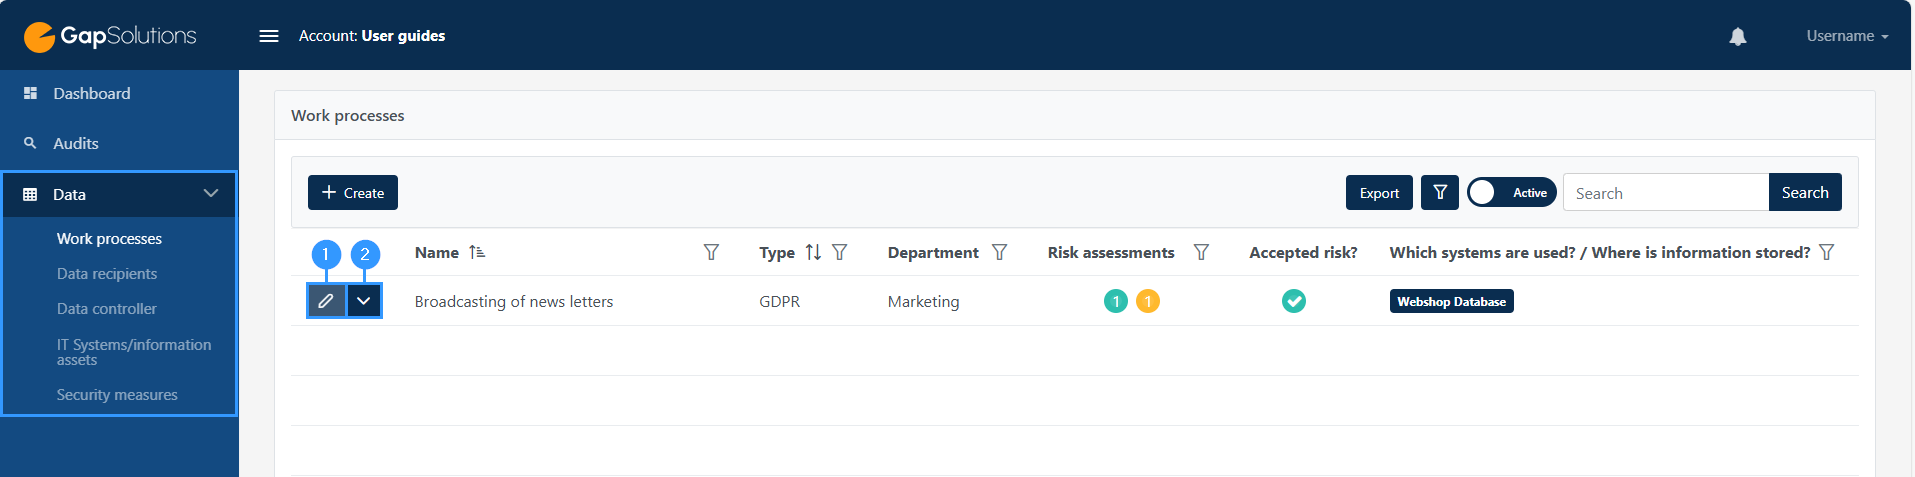
1. Function menu
-When you click here, you open the same formula that you filled in when you created the element. Here you will be able to see everything that is typed in and make changes.
2. Copy, export, archive, delete
-By clicking on this arrow, you will see the various functions located in the function menu.
The functions vary slightly depending on whether you are looking at work processes, data recipients, data processors, IT systems / information assets or security measures.
Icons that show in the different forms in the modules under data
When you are working with the different forms under the menu item ‘Data’, some different icons will show. You can read about the icons below.
Information box
When you click on the little ’i’, an information box with further information about what you should specify in every field will show. The information box can also contain a deepening explanation on the meaning of the choices you can choose.
Adresse
GapSolutions A/S
Uraniavej 6
DK-8700 Horsens
CVR
CVR-nr. 38582356
Telefon
Salg & administration
(+45) 8844 0808
Helpline & konsulenter
(+45) 2199 0808
E-mail
Kontakt@gapsolutions.dk
Support@gapsolutions.dk
Vi bruger udelukkende tekniske cookies på vores hjemmeside. For yderligere information se vores Cookiepolitik.
Vi er ISO 27001-certificeret og ISAE 3000-auditeret.