
Inspection Series
Each time you have something to inspect, an inspection series is created. An example of a series of inspections could be that you inspect every month and ensure that the rejected applications have been deleted. Inspection series help you keep track of all the inspections that need to be carried out on an ongoing basis to comply with GDPR legislation. It is also a good tool for you to remember that you need to inspect.
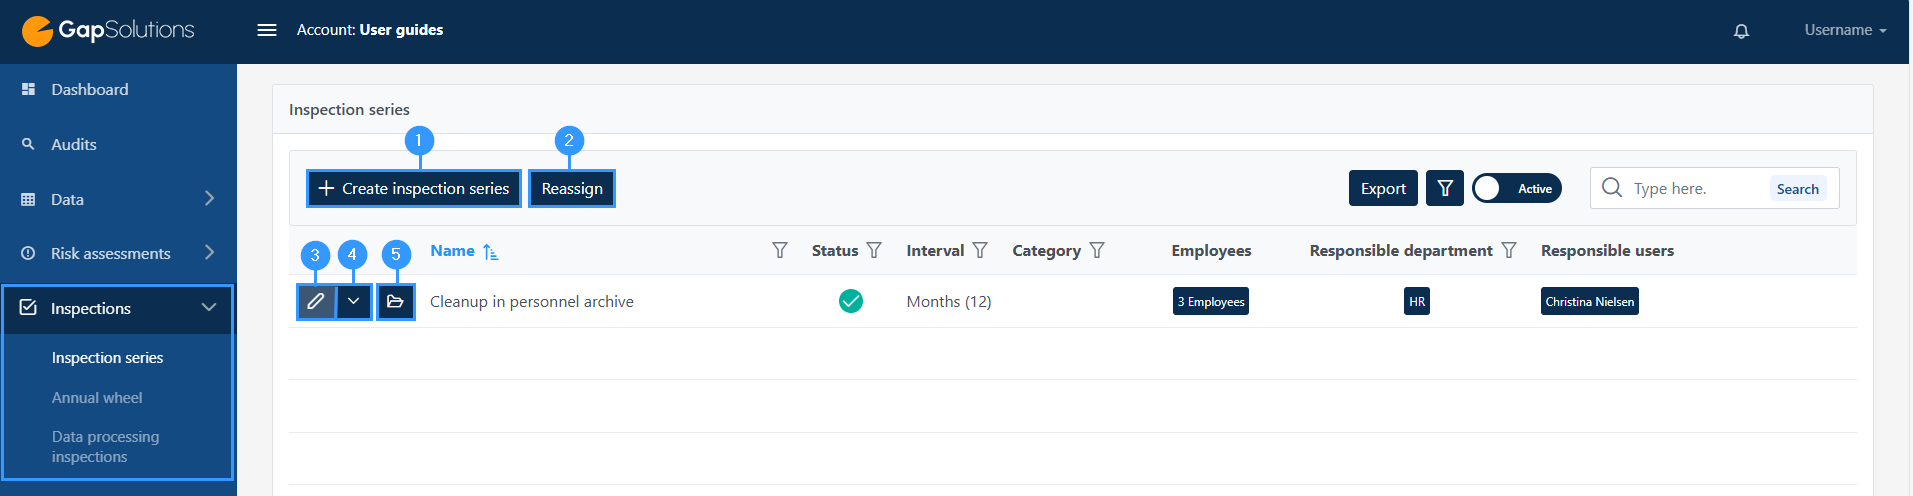
1. Create inspection series
-Click here to create a new inspection series
2. Reassign
-This feature allows you to reassign the inspection to another employee
3. Edit
-By clicking on this button you will be able to edit an existing inspection series
4. Function menu
-In this function menu, besides editing, you can also select employees, archive, duplicate, link, unlink or delete.
When selecting employees you will get an overview of all employees. From this site, you will be able to see which employees that the inspections series have been sent to, and furthermore, it’s possible to send out the inspections series to other employees.
The features link and unlink allows you to link an inspections series to a local element. This is done by clicking on “link”. When clicking here, a window opens, where you will be able to see the local elements, that you can link to the inspections series. Unlink allows you to stop the linking you have created.
5. Open
-click here to open the specific inspection.
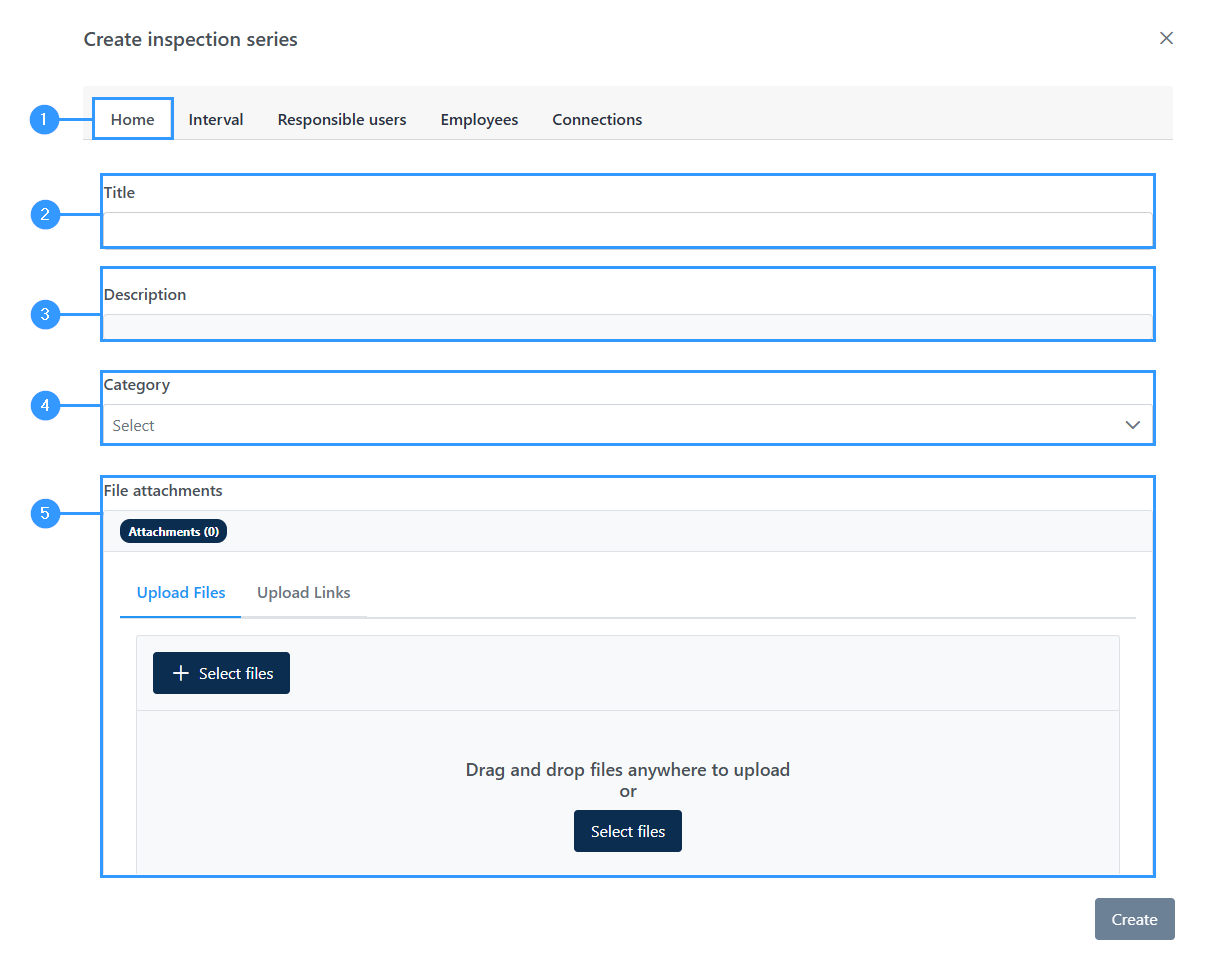
1. Home
When you create/edit an inspection series, this page opens automatically.
2. Title
-Here you need to specify the name of the inspection series you are creating. For example, it could be ‘Review of user rights’.
3. Description
-A description of what needs to be done when inspections are to be carried out shall be given.
4. Category
-Here you need to select the category to which the inspection series belongs. Clicking the field opens a variety of categories for you to select by clicking on them. If there isn’t a category that matches the inspection series, you can create this by typing the category yourself and hitting enter.
5. File attachments
-Here you can attach relevant files for the inspection series you are creating.
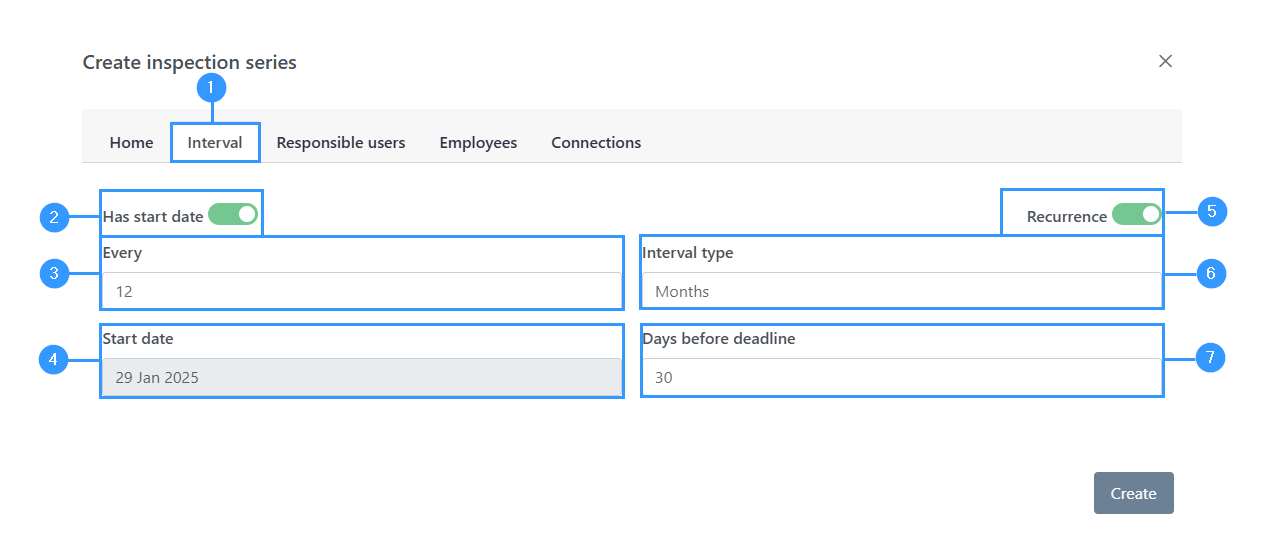
1. Interval
-To get to ‘ Interval’ in the form, click here.
2. Has a start date
-Specify whether the inspection series has a start date. To do this, click the on or off icon. In the example here, it’s turned on. Your choice is crucial for the rest of the fields in this window, as all other fields disappear when you turn the icon off.
3. Every
-Here you should indicate how often the inspection is repeated in days, weeks, and months. Which of the three things the number indicates, you choose in the section Interval type (6).
4. Start date
-Here you specify the start date – this is where the first inspection is to be made.
5. Recurrence
-In this field you need to specify whether it is a recurring inspection. To do this, click the on or off icon. In examples here, it’s turned on. Your choice is crucial for points 4 and 5, which will disappear if ‘recurrence’ is clicked off.
6. Interval type
-This field relates to point (3) in the image – here you need to choose whether the “every” is days, months etc. You do this by clicking on the box where a menu will open, with the possible choices you can make.
7. Days before deadline
-In this field you must specify how many days there are until the deadline for inspections. The days are indicated next to how many days there are until the start date.
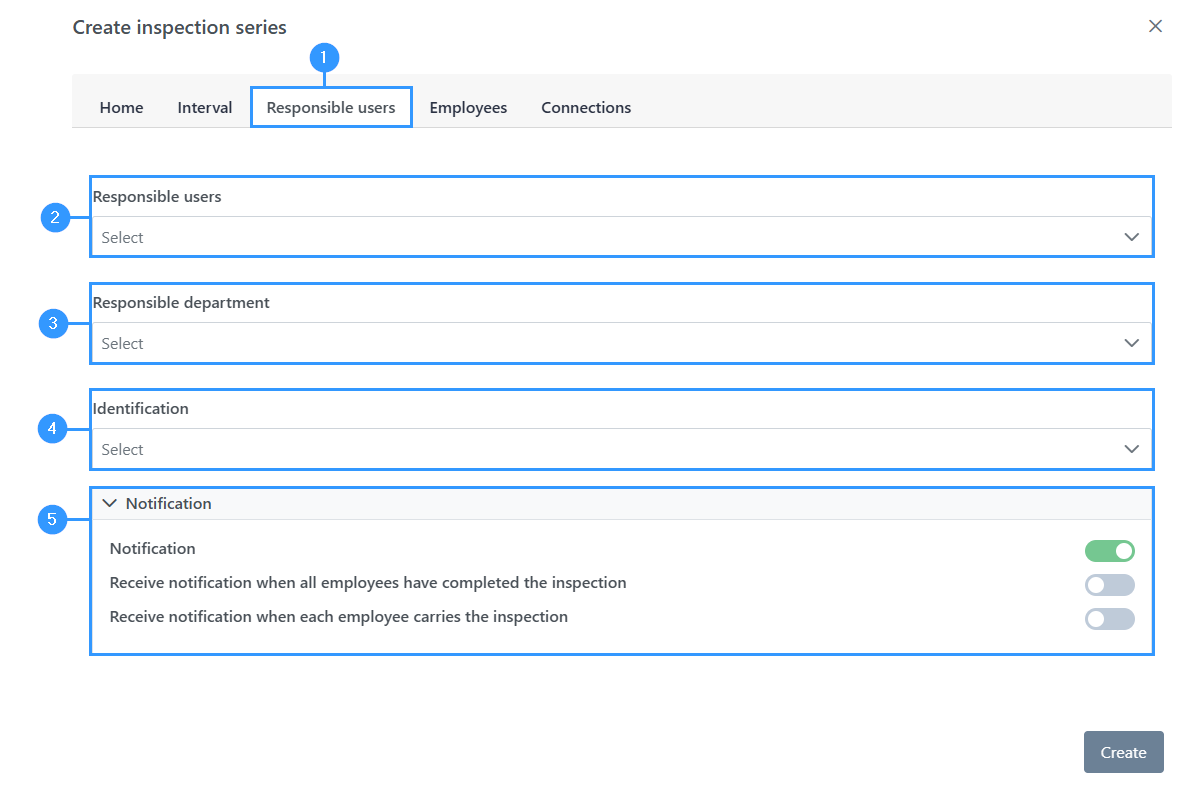
1. Responsible users
-To get to ‘Responsible Users’ in the form, click here.
2. Responsible users
-Here you need to specify the responsible user(s) for the inspection series. By clicking on the field, a menu will open where you can choose between the different users in the portal.
3. Responsible department
-Here you need to specify the department responsible for the inspection series.
4. Identification
–
5. Notification
-This box is checked if you want a notification to be sent when it is about time to carry out the inspection.
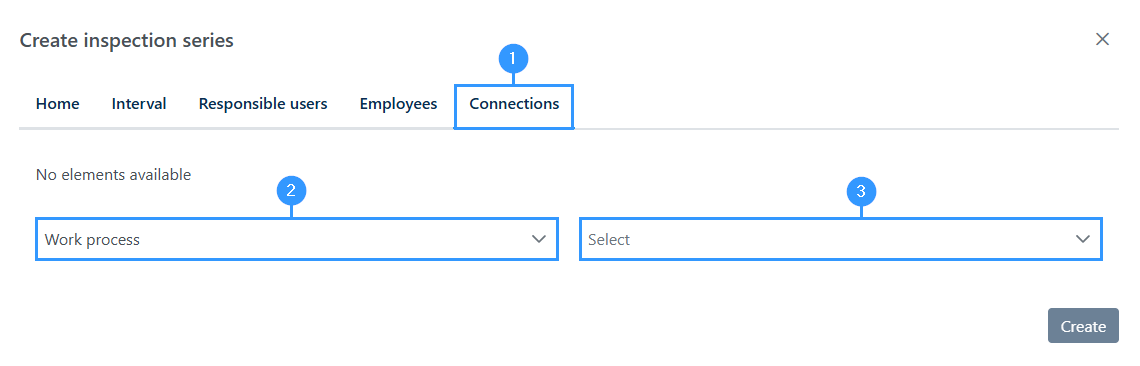
1. Conncetions
-To get to “Connections” in the form, click here.
2. Elements
-By clicking here, an overview of categories of connections you can choose opens. What you choose here will determine the choices you can make in section 3.
3. Connections
-Here you will be able to choose which connections, based on the category you selected in section 2, you want to add to the inspection series.
Please notice,
Remember to click create when you’re done filling out the form. If you tap the cross in the upper right corner, you close the form without saving your changes.
Adresse
GapSolutions A/S
Uraniavej 6
DK-8700 Horsens
CVR
CVR-nr. 38582356
Telefon
Salg & administration
(+45) 8844 0808
Helpline & konsulenter
(+45) 2199 0808
E-mail
Kontakt@gapsolutions.dk
Support@gapsolutions.dk
Vi bruger udelukkende tekniske cookies på vores hjemmeside. For yderligere information se vores Cookiepolitik.
Vi er ISO 27001-certificeret og ISAE 3000-auditeret.