
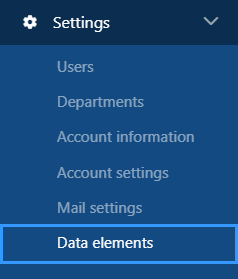
Settings
In the “settings” module you can access and edit users and departments in the portal. Here you can also find information for the account as well as access the accounts settings and edit these.
In addition, you will also find mail settings and data elements.
Users
In the sub-item “Users” you can see an overview of the users created in the portal.
The overview looks like this:
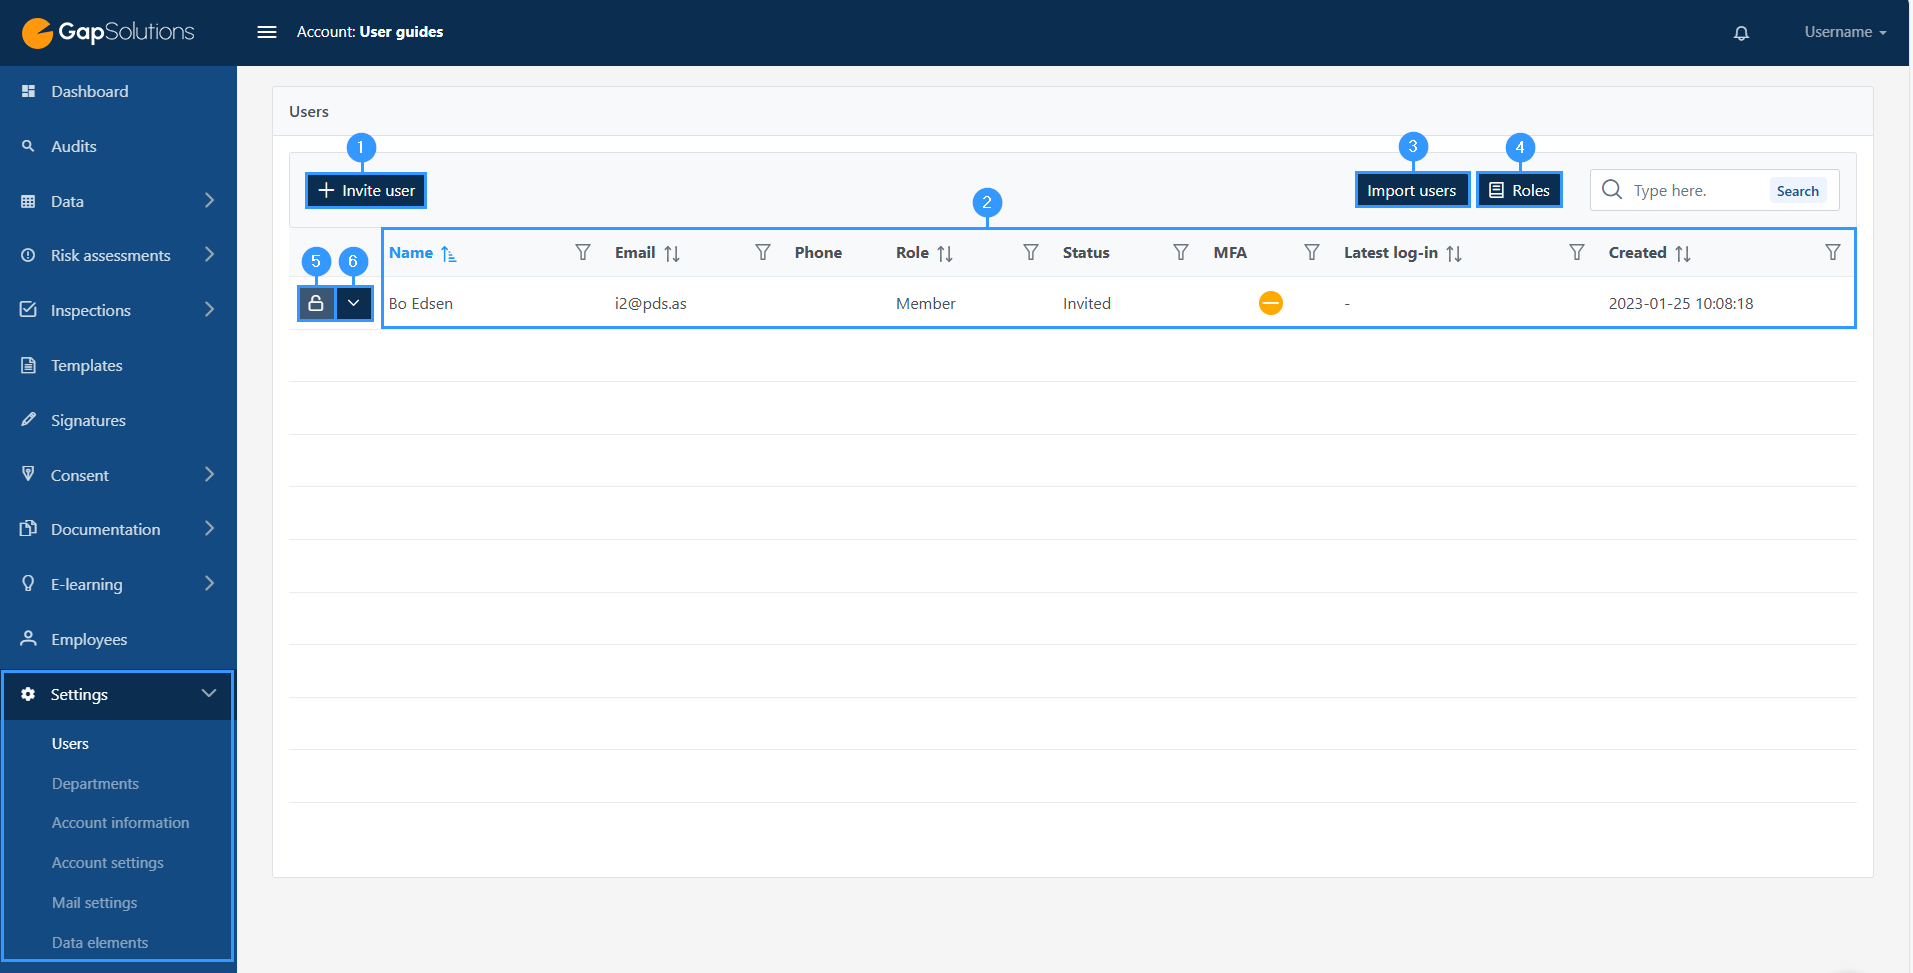
1. Invite a new user.
-here you can invite and create a new user to your portal.
2. Overview
-This is an overview of the individual user, where you can see general information. You can also see if the user has accepted the invitation to the portal, when the user was created, and information about the last time the user was logged in.
3. Import users
-Here you can import users and clicking here will open an option to import CSV.
4. Roles
-When clicking on “Roles” you will be able to see the various users and their roles. Furthermore you will also be able to create roles for the users
5. Permissions
-By clicking here you get an overview of what permissions the user has. The overview is divided into administrator permissions, member permissions and visitor permissions.
The permissions will basically reflect the role that you chose during creation, but here you can edit the specific permissions that the user gets.
6. Delete
-Here you can delete the user.
When inviting a new user, as shown (1) in the picture above, the following form will open:
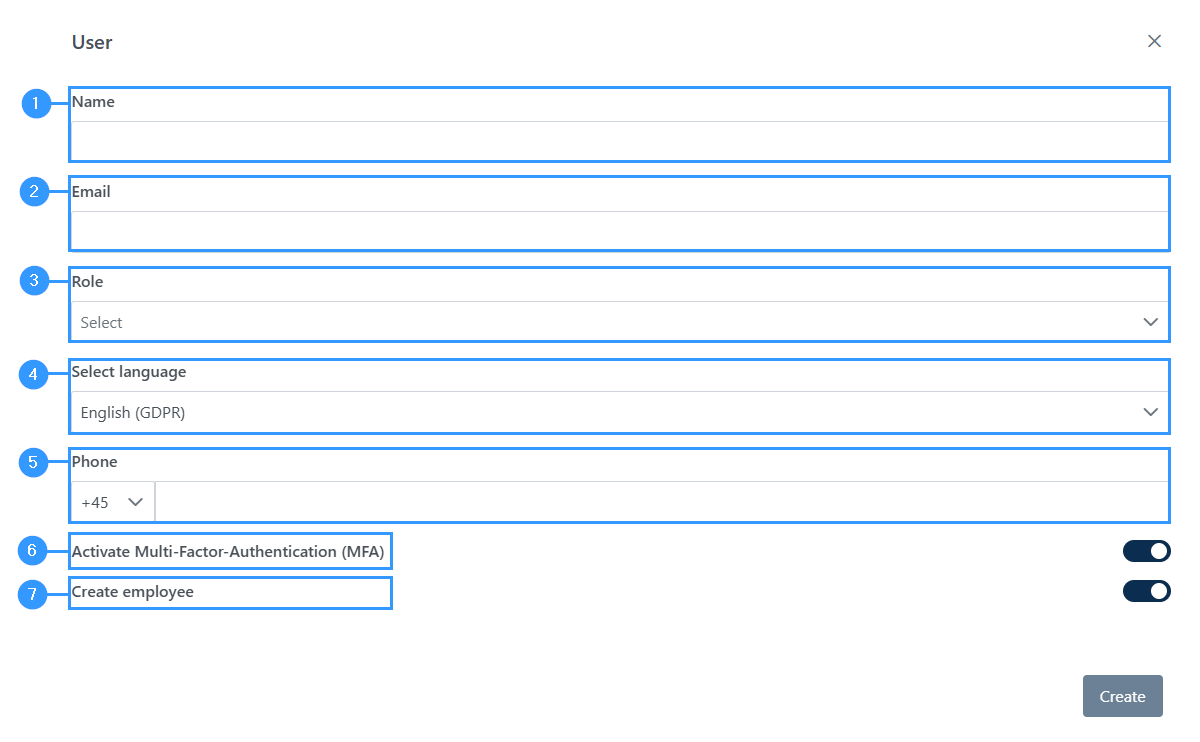
1. Name
-Name of the user
2. Email
-User’s email
3. Role
-Clicking here will open a window with the following different choices: administrator, member, or visitor. The most used is administrator that allows the user to create and edit.
An example of when you can use the “visitor” function is, for example, if an accountant needs to get access to see information in the portal but should not be able to change anything in the portal.
4. Select language
Select the user’s language. This will affect what language the portal will be shown in.
5. Phone
-User’s phone number
6. Activate MFA
Specify whether you want the user to log in with multi-factor authentication (MFA).
We recommend this to increase the level of security.
7. Create employee
Here you can choose whether the user you create is an employee who should also be created as an employee.
In this way, the portal automatically takes the entered information and creates the user as an employee as well.
Departments
By creating departments, you can create a better structure over the individual elements of the portal. It can be helpful in the case that you want to create inspections for an individual department. The larger the company, the greater the need to use this feature, as there will be a greater need for segmentation and structuring in the portal.
In the sub-item “Departments” you can see an overview of the departments created in the portal. The overview looks like this:
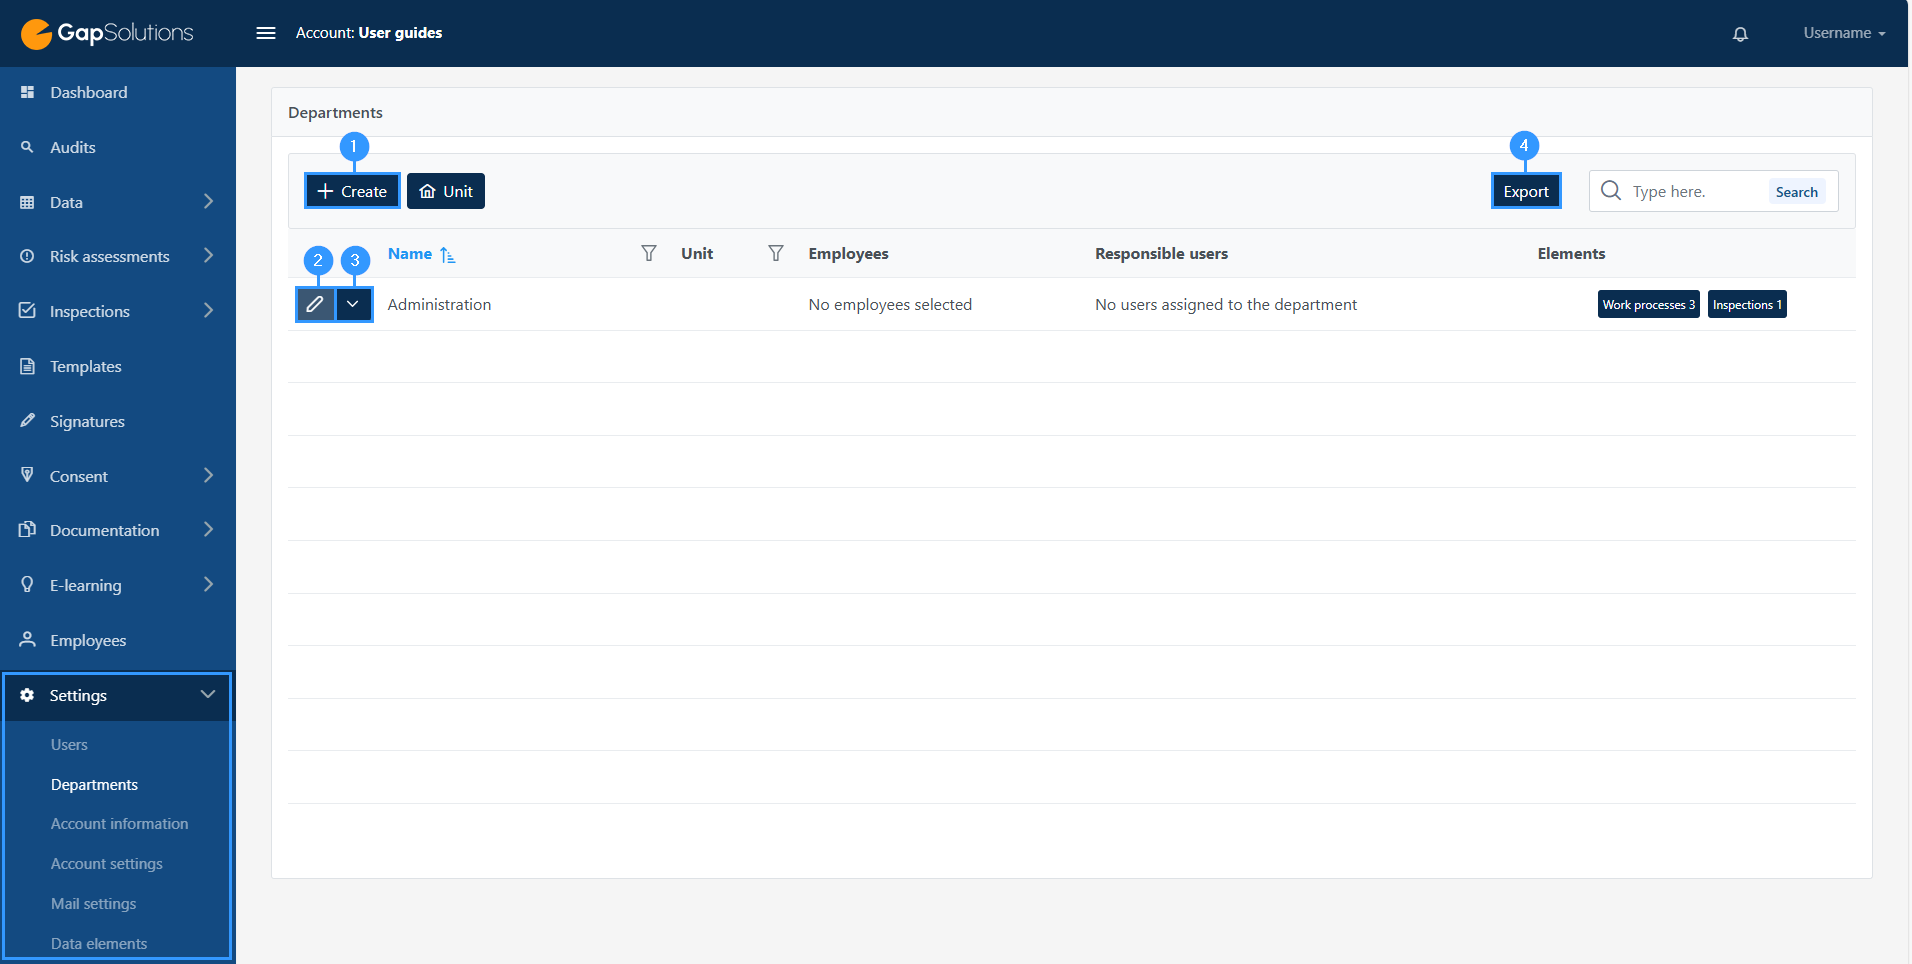
1. Create
-When you click here, a window will open in which you need to specify the name of the department, employees, department members and unit.
2. Edit
-By clicking here, you can edit the name of the department, users associated with the department and whether users get notifications at department inspections.
3. Delete
-Here you can delete a department.
4. Export
-Export departments to Excel.
Account information
Here you can see all the information for the account you work in in the portal. Clicking on this sub-item opens a form. The form looks like this:
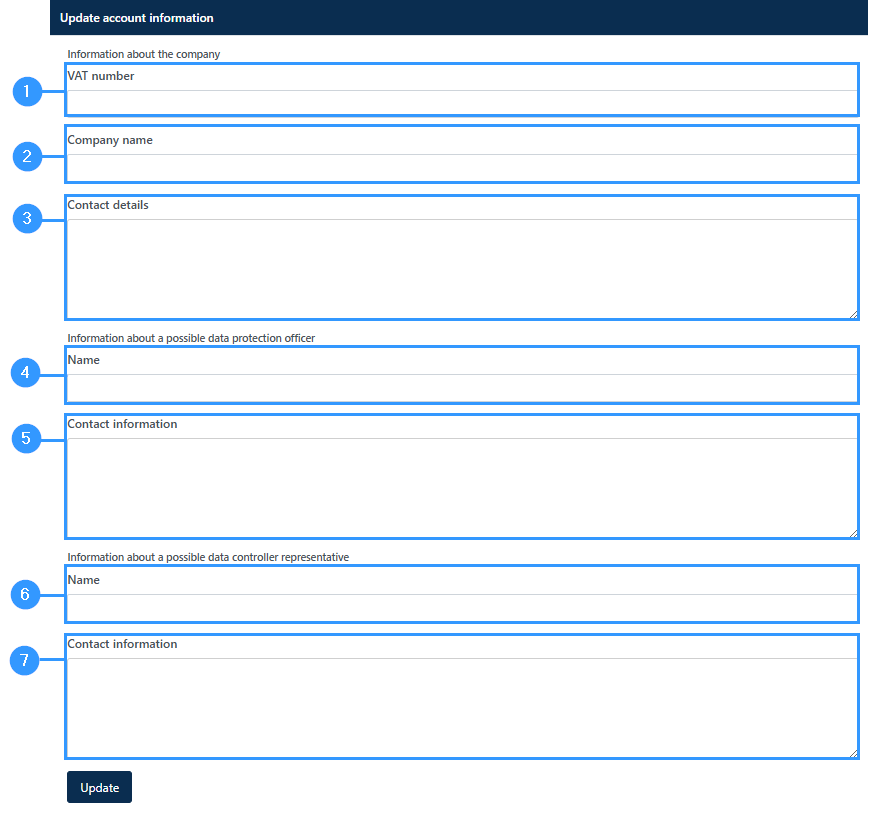
1. VAT-number
-Fill in the VAT number of the company
2. Company name
-Fill in the company name
3. Contact details
-the contact information could be the adress of the company, e-mail and phone number.
4. Name
-Name of a possible data protection officer
A data protection officer, “DPO” is the one who informs and advices the data controller, data processor and the employees that process personal data, regarding their obligations in relation to the legeslation and supervises if the company complies with the legislation.
5. Contact information
-This could be information such as phone number and email.
6. Name of a possible data controller representative
-The person who decides for what purpose and with what means the processing of personal data may be carried out is the data controller.
7. Contact information on a possible data controller representative
-This could be information such as phone number and email.
Account Settings
When you open account settings you will see a menu of different items that can be set in this module.
The following points can be set:
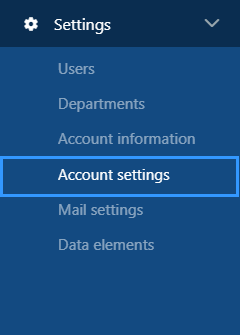

By clicking on one of the fields in the menu, the item will unfold, and here you can access the specific settings for each item in the menu:
1. Enforce MFA
-With this feature, you can choose whether this account should use Multi-Factor Authentication as a default setting. If you turn this on, the users you create will have turned on by default to log in with multi-factor authentication.
2. Manage inspection categories
-Here you can create categories within inspections.
This has an impact on creating inspections, where it will be possible to assign them a category and thus segment and structure your portal.
3. Manage file categories
-As with inspection categories, it is possible to create categories for files.
4. Standard descriptions
-Here it is possible to create standard descriptions. When you want to create a standard description, click ‘create’ and a smaller form will open. In case you have made a standard description, it will be possible to click on this in the form, and it will automatically fill in fields for you, so you do not have to sit and copy this in yourself.
5. Extended data
-If you want to customize parts of the portal, this is where it is done. If you are in doubt about whether and how your company should use the feature, we encourage you to contact us at GapSolutions a/s
6. Responsible users
-Here it is possible to choose for a number of different parts of the portal whether to specify a responsible user. By default, this item is always turned on, and the form for work processes will therefore have a field where you must specify the responsible user. If you turn this off, the form will no longer have this field.
Mail settings
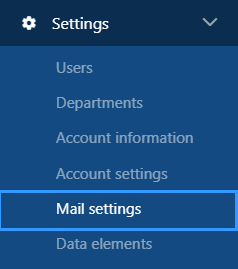
In this module, you can access email settings. Please note that it is recommended to use your own mail server. By using your own mail server you avoid problems with spam and that employees may suspect emails of being attempts of phishing.
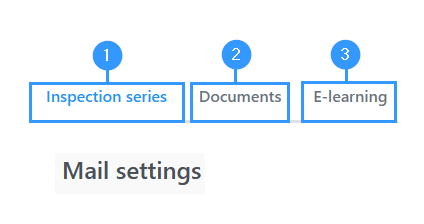
1. Mail settings for inspection series
2. Mail settings for documents
3. Mail settings regarding E-learning
Here you will have the opportunity to navigate the types of emails you want to access and edit by clicking on the item you want to access email settings for.
Data elements
In the item data elements it is possible to go in and edit which data elements should be available for a number of different parts of the portal.
This concerns work processes, IT systems / information assets, data recipients and risk assessments. Under this section, you can connect whether it should be possible to choose the type and, if so, which types should be connected to the different parts of the portal. For all four categories, you can turn on whether GDPR should be a data element.
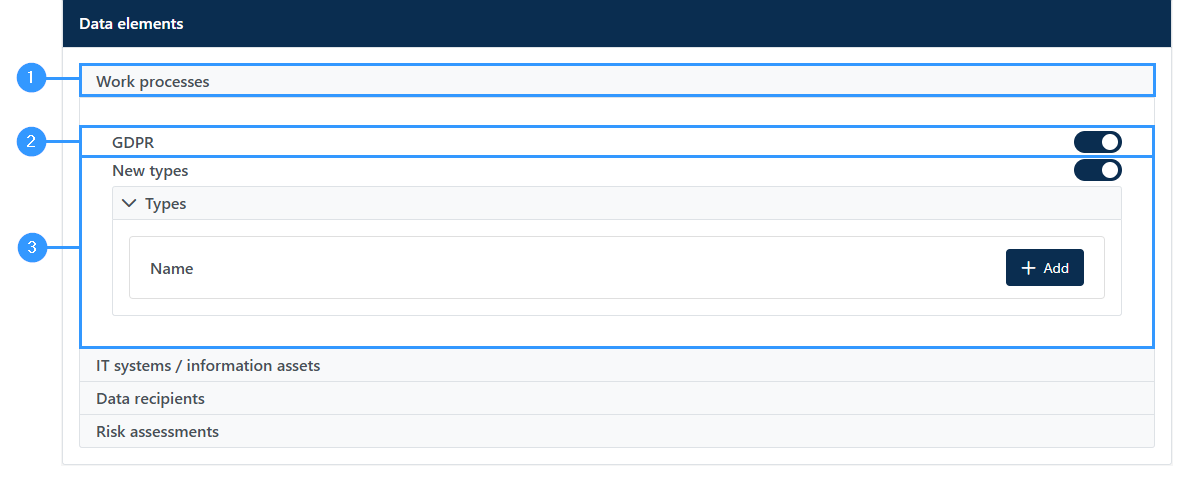
-In addition, you can add other types if you want to use the portal for information security (2).
If you want to create work processes that are not GDPR related, you can click on the “new types” icon and a bar will appear where you need to press ‘”add” (3).
This will open a form where you need to give the type you want to create a title. Next, choose which items to fill in in your work processes.
The parts you can choose are like those in a GDPR work process – however, it will not be necessary to have a legal basis when you do not handle GDPR, and you can therefore avoid clicking these fields.
It’s up to you to choose what information is needed for the type you want to create. This means that when creating a work process it will be possible to select type at the top of the form. When choosing a type the form will adabt according to what information you have selected to fill out for work processes of that type.
Adresse
GapSolutions A/S
Uraniavej 6
DK-8700 Horsens
CVR
CVR-nr. 38582356
Telefon
Salg & administration
(+45) 8844 0808
Helpline & konsulenter
(+45) 2199 0808
E-mail
Kontakt@gapsolutions.dk
Support@gapsolutions.dk
Vi bruger udelukkende tekniske cookies på vores hjemmeside. For yderligere information se vores Cookiepolitik.
Vi er ISO 27001-certificeret og ISAE 3000-auditeret.