
Data Recipients
A data recipient is a legal or physical person, a public authority, or another person to whom personal data are disclosed. It can be anything from your bank and SKAT to Microsoft Office, etc.
The overview of the data recepients
Below, some relevant elements of the overview will be reviewed. It is important to note that the overview can vary, as it is possible to set which columns you want to be displayed and in what order these are displayed.
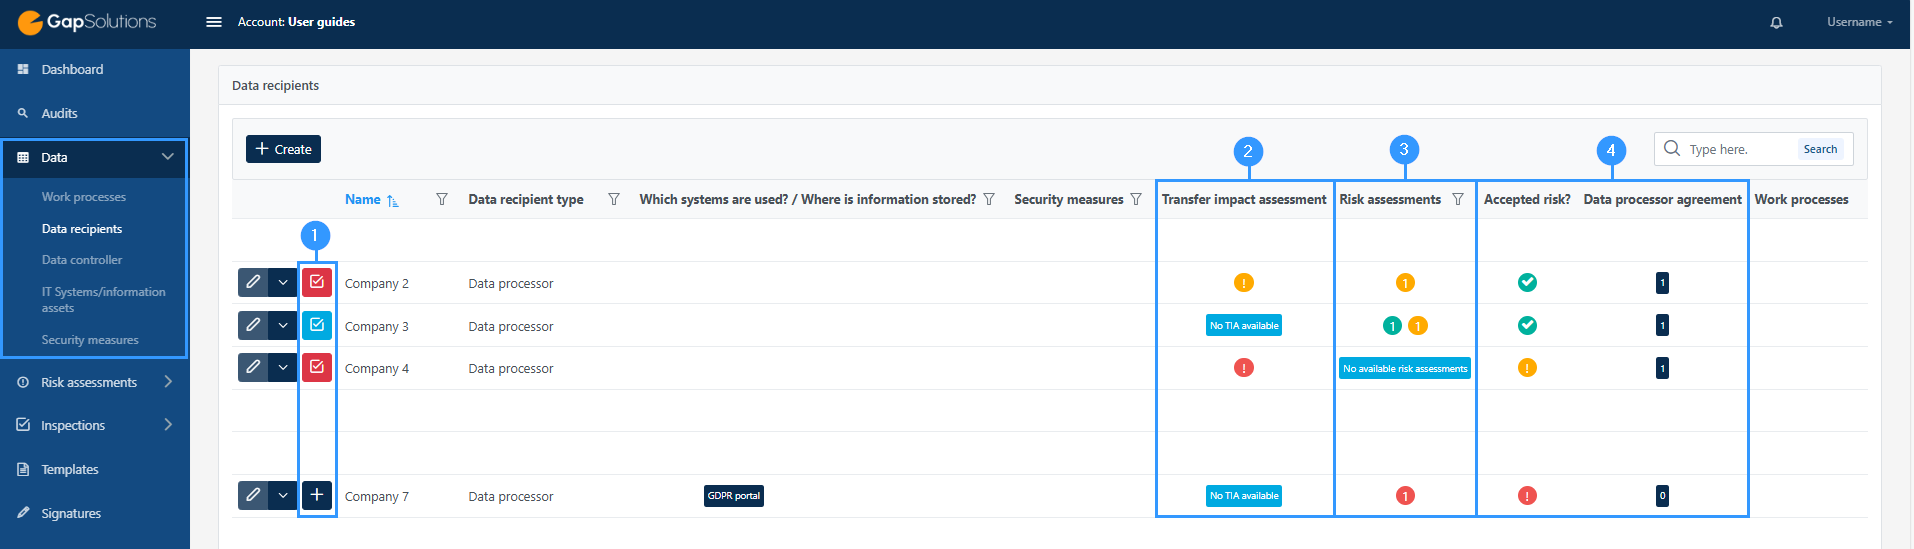
1. Function menu
-These icons are expressions of inspections. There will be an icon next to each data recipient, where you are registered as a data processor, as you as a data processor must inspect your data recipients.
The red icon indicates that an inspection series has been created and that it has been exceeded.
The blue icon indicates that an inspection series has been created, but a start date has not yet been set.
The dark-blue plus indicates that no inspection series has been created.
Read more about data processing inspections here.
2. Transfer impact assessment
-Here it is possible to see the status of a TIA if there is a transfer to a third country.
Icons will only be displayed next to a data recipient if you have registered that a transfer to a third country is taking place and therefore a TIA must be created.
If a blue TIA-icon appears, it indicates that a TIA has not been prepared.
Read more about creating a TIA here.
3. Risk assessments
-This column reflects the risk assessments carried out regarding the data processor.
The different colors disclaimes various risks divided into different colors;
Red represents a high risk, which requires a position to be taken, since a high risk is unacceptable.
Yellow indicates a medium risk.
Green indicates a low risk.
The blue icon on the example above indicates that a risk assessment has not yet been made. You can click here and create one directly.
In some cases, you want to prepare a risk assessment for the specific data recipient, which is done from this side. In other cases, you want to create risk assessments within the same category. If this is the case, it is done from the module “risk assessments”. You can read more about risk assessments here.
4. Data processor agreement
-These dark blue icons are expressions of data processing agreements.
Next to each data recipient, there will be an icon with a number. The number indicates how many data processing agreements have been created for each data recipient. If it says zero, it means that no data processing agreement has been created. If you want to upload a data processing agreement, this can be done by clicking on the icon, after which a window will open.
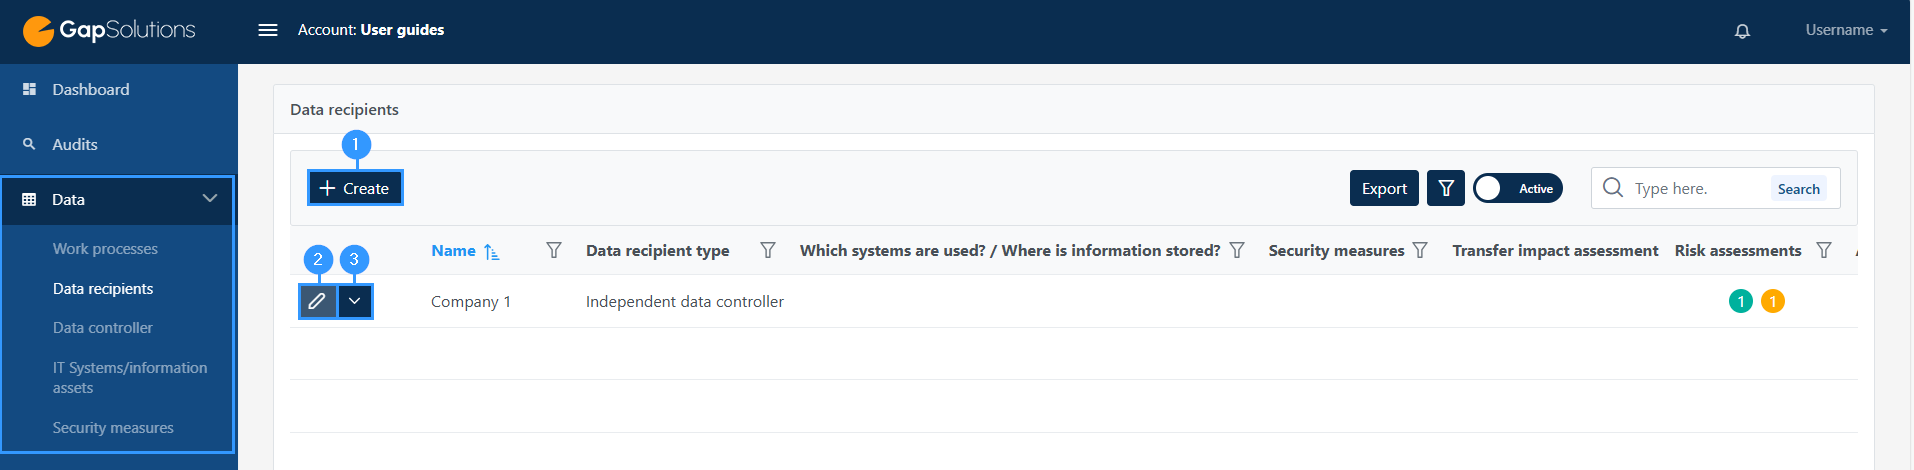
1. Create
-To create a data recipient, click here
2. Edit
-Here you can edit an existing data recipient
3. Archive, export, delete.
-With this feature, you can choose archive, export or delete.
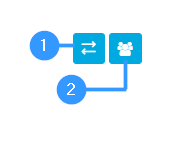
1. Redistribute
-This function gives you access to redistribute the data recepient. When clicking here you will get an overview of the various data recepients which you can choose from.
2. Employees
-The function allows the data recipient to be sent to an employee who can edit the data recipient through a link. This may be relevant in cases where an employee only rarely needs to correct the data recipients or where you want to limit what the individual can access of data in the portal.
When filling out the form, there will be som different icons at some of the fields. You can see an example of the icons here:

1. Exclamation mark
-The red exclamation mark is an expression of a gap.
2. Infobox
-The blue “i”-icon is an info box.

1. Name of data recipient
-Here you need to type in the name of the data recipient.
2. Data recipient type
-Clicking this opens an exhaustive list of data recipient types. Your choice of data recipient type is crucial to the rest of the form’s content. If you are in doubt about which type of data recipient to choose, you can click on the blue infobox next to the field and an explanation of the different types will appear.
As the form will adapt a lot in order to which type of data recipient you choose, the guide through the rest of the form will be divided into the different types, you can choose. Click on the one you have chosen in the blue box below, which will lead you to the rest of the user guide.
Click on the relevant data recipient type below for further guidance on completing the form:
Adresse
GapSolutions A/S
Uraniavej 6
DK-8700 Horsens
CVR
CVR-nr. 38582356
Telefon
Salg & administration
(+45) 8844 0808
Helpline & konsulenter
(+45) 2199 0808
E-mail
Kontakt@gapsolutions.dk
Support@gapsolutions.dk
Vi bruger udelukkende tekniske cookies på vores hjemmeside. For yderligere information se vores Cookiepolitik.
Vi er ISO 27001-certificeret og ISAE 3000-auditeret.