
E-learning
In the menu bar on the left side of the portal, you will find the menu item ‘E-learning’. The item is divided into sub-items, and here you can access an overview of the existing E-learnings, templates, and sequence.
Below, the various functions of the E-learning module will be reviewed.
Overview
In “Overview” you can see all the E-learnings that are currently created. For example, it may look like this:
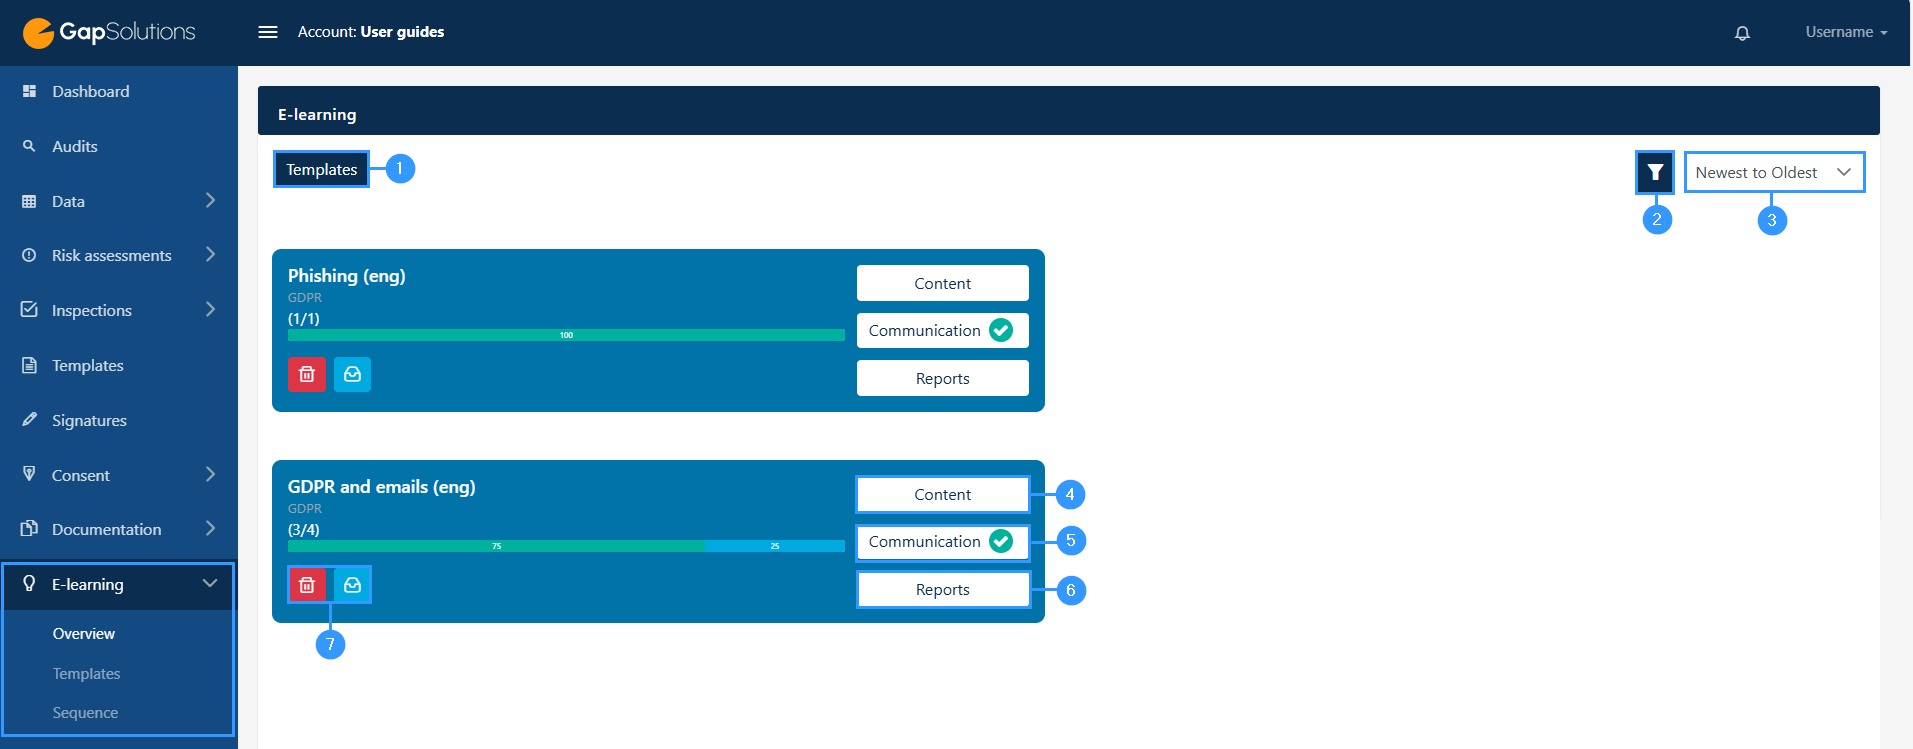
1. Templates
-By clicking here, the portal will send you to the sub-item ‘templates’, where you will be able to see all the templates for E-learning you have in the portal.
2. Ȳ-funnel
-Advanced search function that allows you to sort what is shown first and whether archived e-learnings are to be displayed.
3. Newest to Oldest
-In case there are many existing E-learnings in the overview, you can click here, where a search box will open.
4. Content
-Here you can access the content of the individual e-learning. Clicking here opens a new page, and how to navigate here is elaborated further down.
5. Communication
-By clicking here, you can access the emails sent out as invitations and reminders for answering an e-learning and in addition which people receive the individual e-learning.
6. Reports
-Under reports, you can access results on the individual e-learning. The report icon is first accessable when some of the persons you have sent the E-learning to has gone through it.
7. Delete/archive
-Here you can delete and archive an e-learning.
Create an E-learning
If you want to create a new e-learning, click on “templates” in the overview or go directly there, by clicking on E-learnings in the menu bar and then the sub-item templates. Once on this page, the portal will look like this:
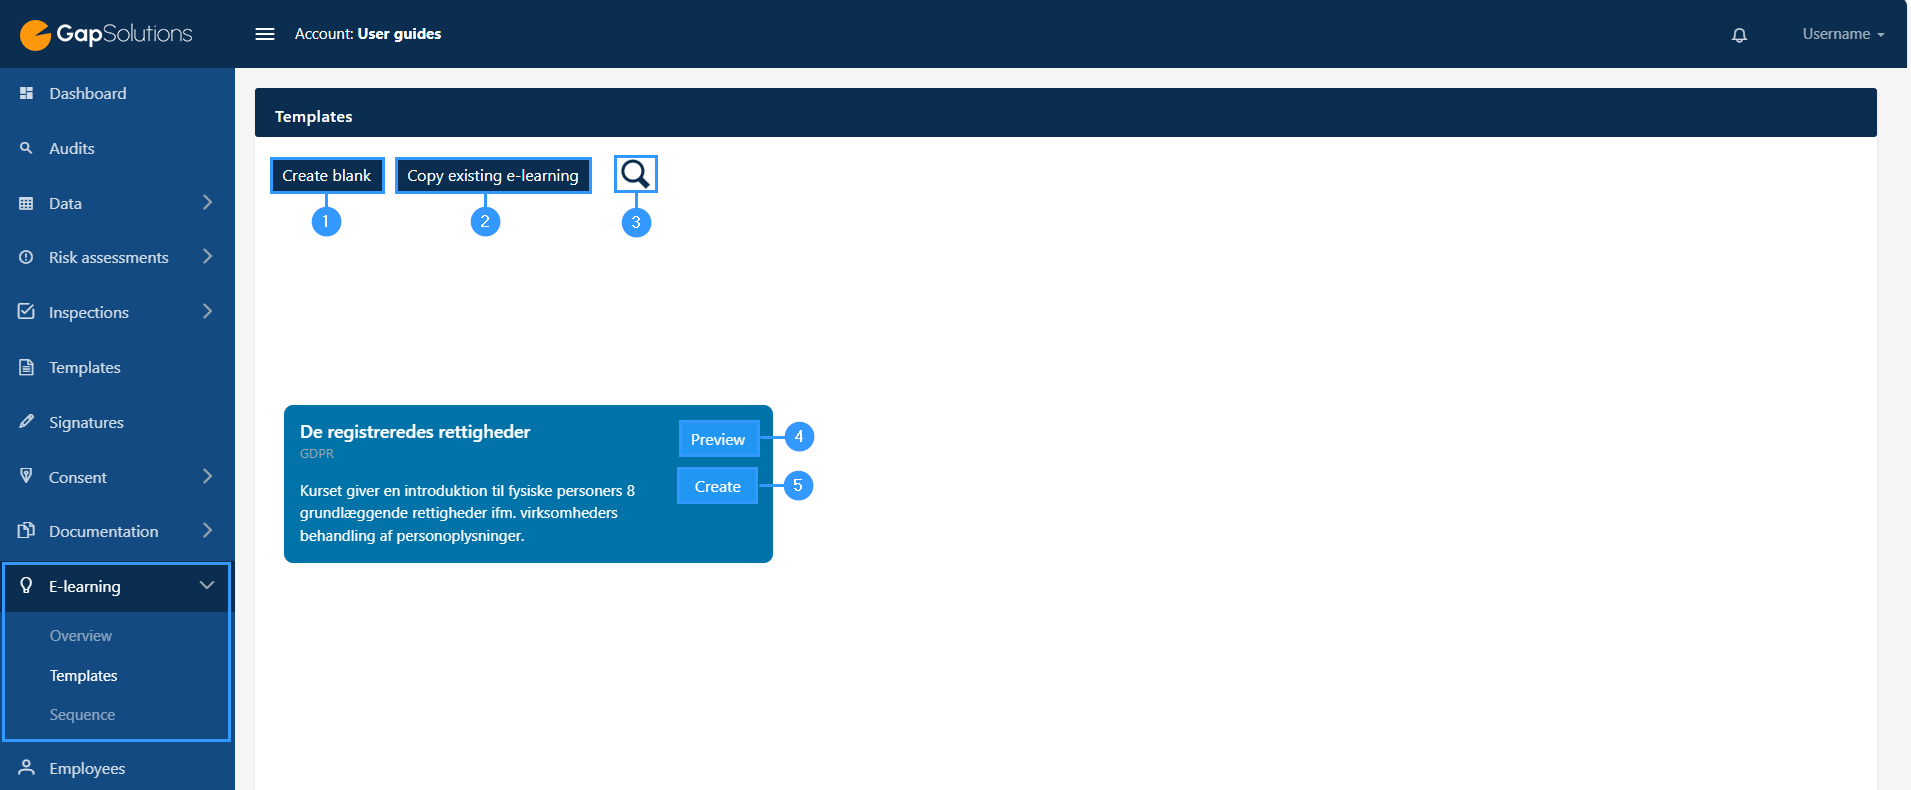
1. Create blank
When you click here, a window opens where you must specify the title of the e-learning you want to create together with a description thereof.
2. Copy existing e-learning.
-Clicking on the field opens a field where you can choose from all the existing e-learnings.
3. Search-icon
-Here you can search for a specific e-learning template.
4. Preview
-Here you can preview the template and see what the e-learning’s slide and structure looks like.
6. Create
-Here you can create an e-learning from the specific template.
Customizable elements in e-learning
Whether you choose to use a template or create an e-learning yourself, there are a few elements that can always be adapted for each e-learning.
Slides
To access slides, click on “content” (1) in the image below, on the individual e-learning where you want to view slides:
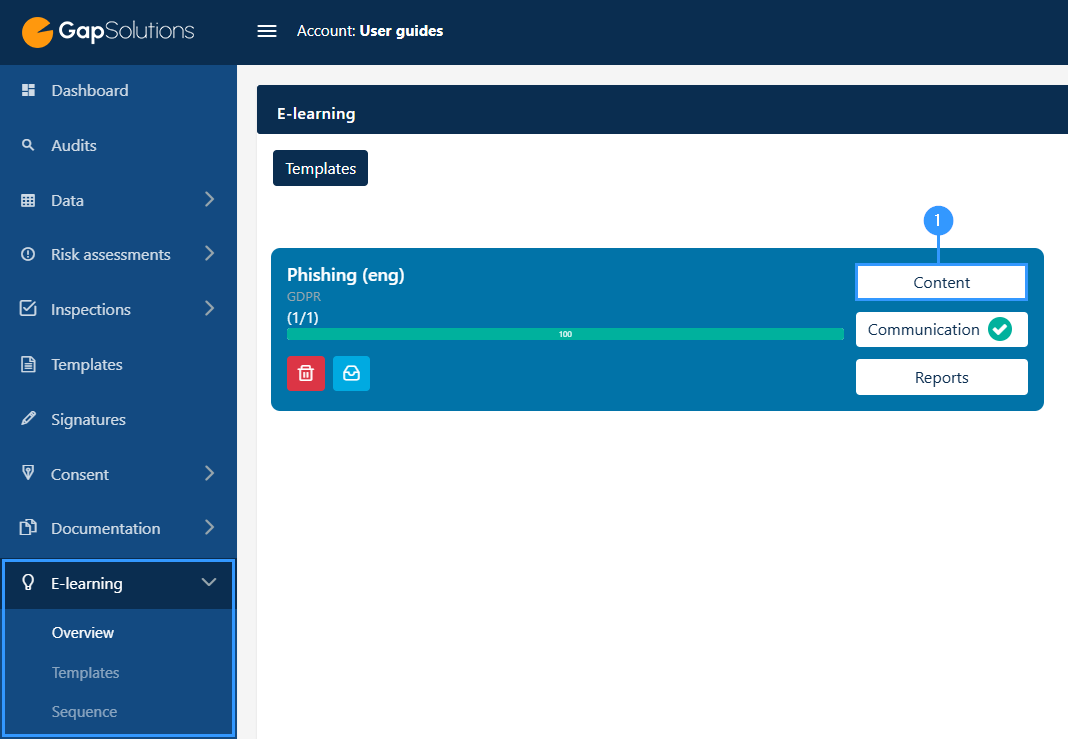
1. Content
-When you click here, you will automatically be added to the overview of all slides for the e-learning in question. The overview might look like this:
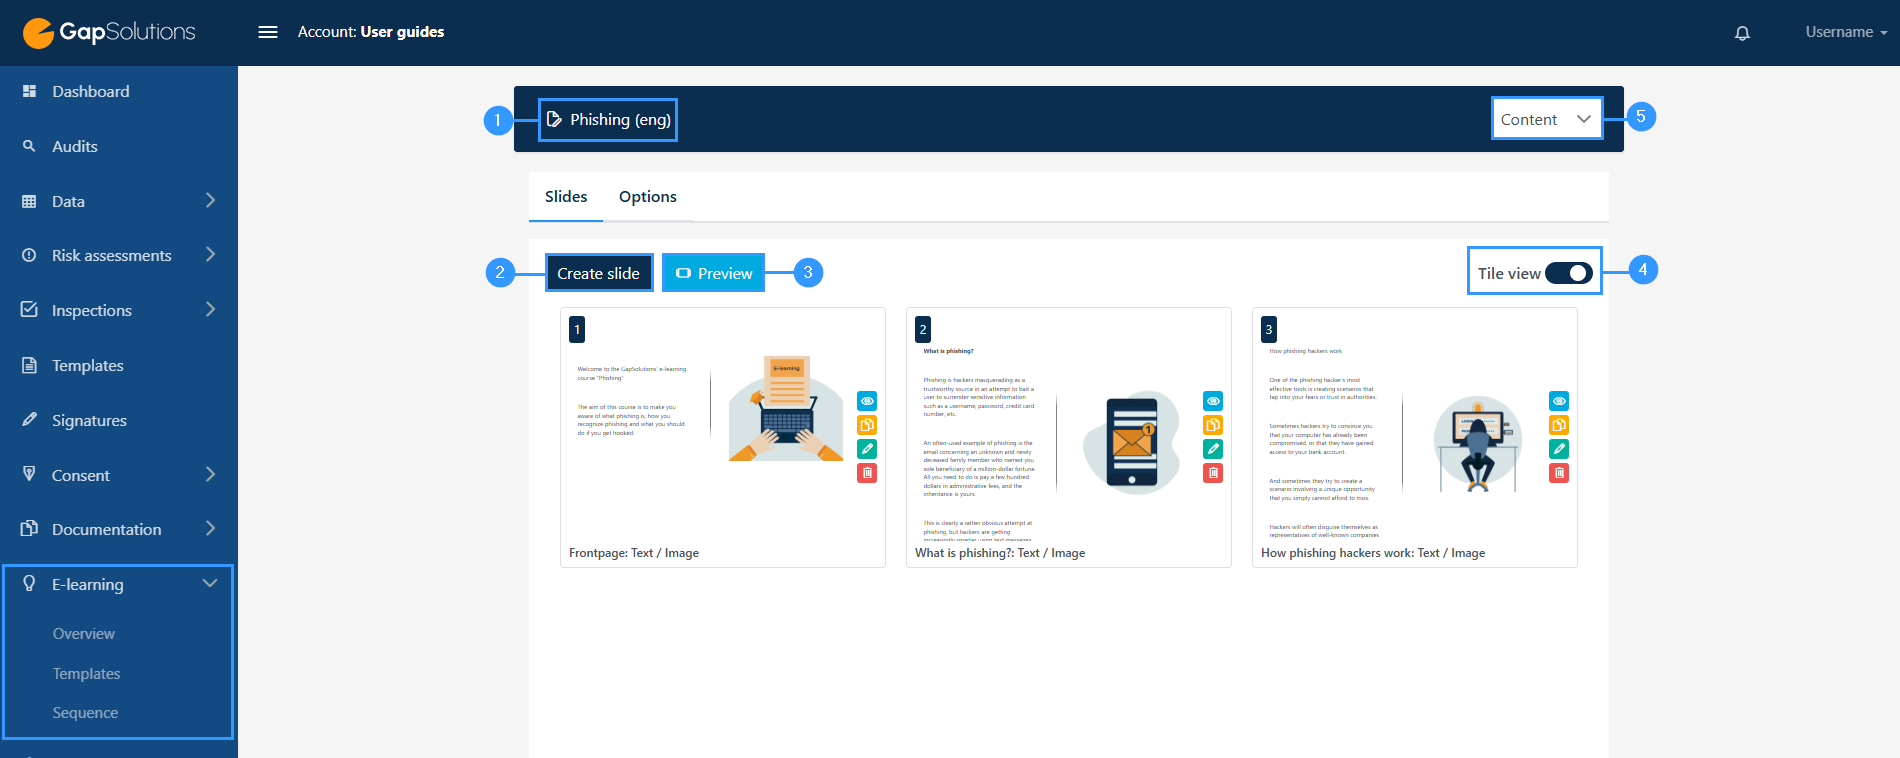
1. Edit title or description
-By clicking on the icon to the left of the title, you can open a window where you can edit the title as well as the description of the e-learning in question.
2. Create slide
-When you click here, a window opens where you need to type a title on the slide you want to create and choose the layout and type for each slide. How slides work in context will be reviewed further down.
3. Preview
-This feature allows you to preview the individual e-learning, so you can see how it looks when you receive the e-learning for answering.
4. Tile view
-Here you can set how you want the overview of an e-learning to be displayed. When you enter slides, the page will automatically be set up to show a ‘tile view’, where you get a small preview of each slide. If you only want the titles of slides, you can edit this by clicking this icon off.
5. Content
-Here you can navigate between content, communication, and reports. This bar will be shown regardless of what part of the e-learning you’re working in.
Order of slides
If you want to edit the order of the slides, this is done by clicking on the slide you want to move and dragging it to where you want it to be.
Options
To access general settings for an e-learning, you must, as with slides, click on “content” (1), on the individual e-learning you want to access or edit:
When you click on “content” (1) you will get to an overview of all slides. The overview could look like this:
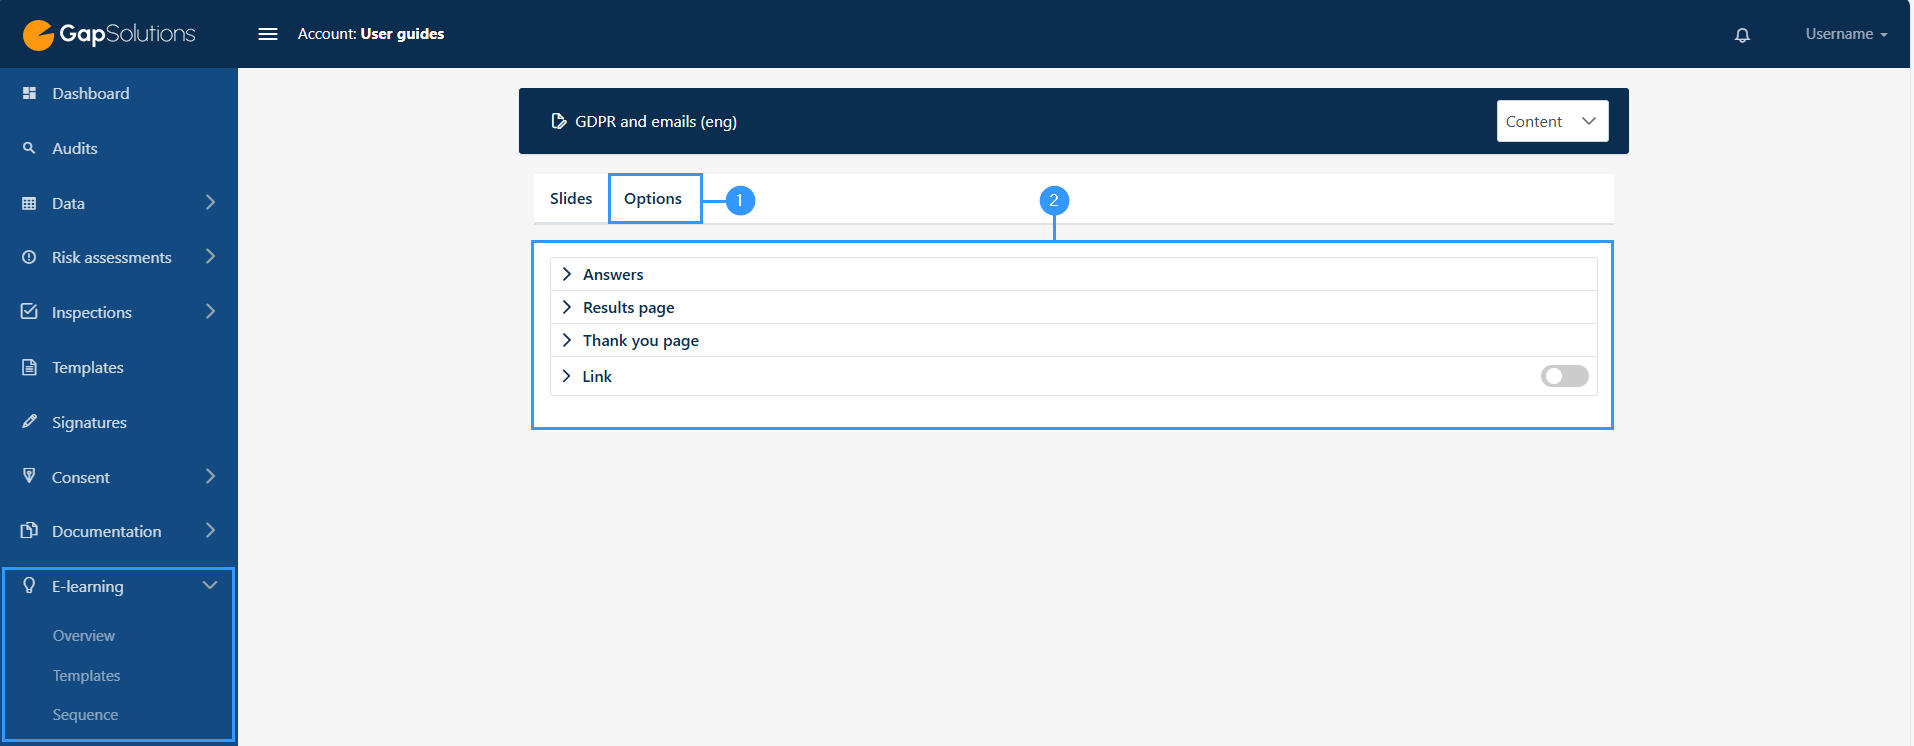

1. Options
-To access the different settings, click on “options”.
2. Overview
-Here you can see and access the items where you can edit the settings.
3. Answers
–Here you can set whether participants can go back to previous questions or not. This is set by clicking on the box that appears – if clicked on, participants will not be able to go back in previous replies
4. Results page
–Here you can edit how the page that shows the results for the answer to the participant should be set up. You can choose from four different options:
Disabled: here, participants will not be able to see their results when they have completed an e-learning.
Percentage: at this setting, participants can see the percentage of their correct answer.
Failed questions: participants only see their wrong answers.
All questions: participants see all answers, and the correct answer to failed questions also appears.
Thank you page
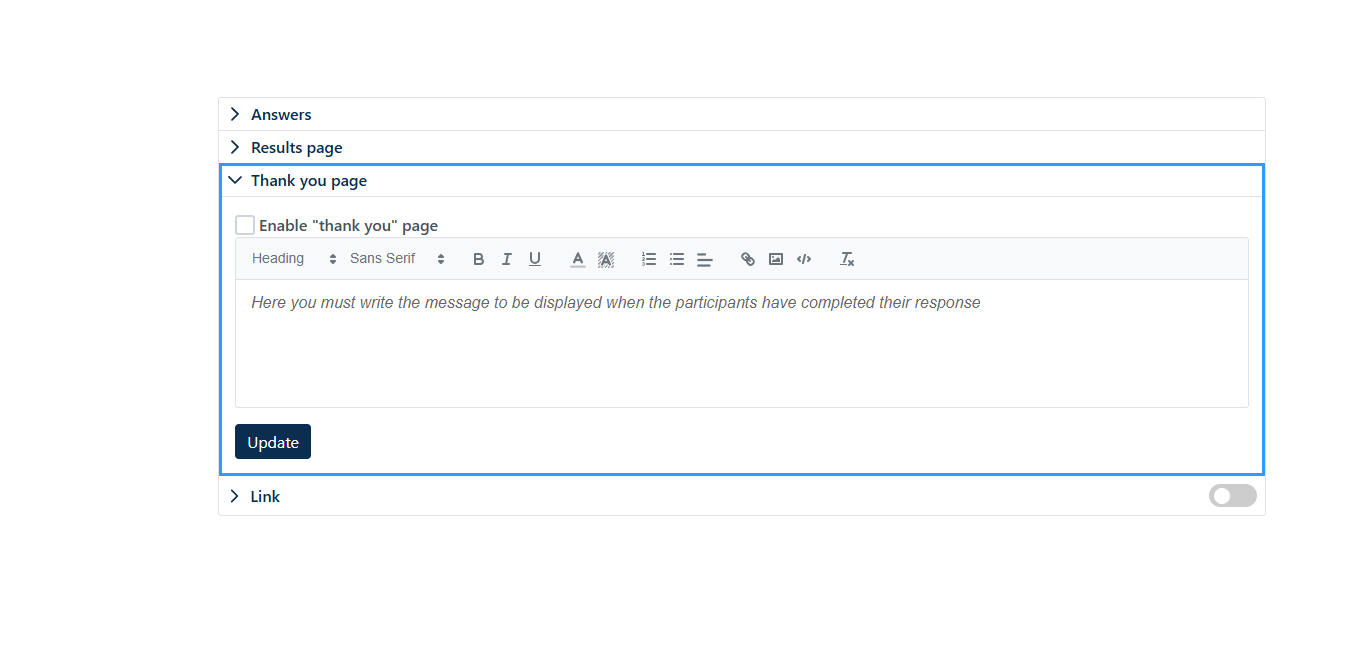
Here you can choose whether there should be a thank you page at the end of the e-learning and write the text you want to appear in the thank you page.
Link
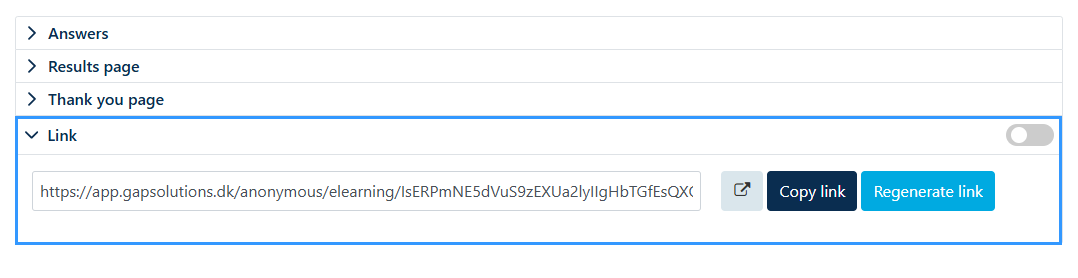
Here you can choose whether there should be a link to the e-learning, by clicking it on or off on the icon in the bar.
When you click on the bar you can see the link, open it, copy it, and regenerate the link:
Emails

To access e-mails in relation to the individual e-learning, you must click on ‘communication’ (1) in the overview of e-learning, after which you will go directly to the settings for emails.:
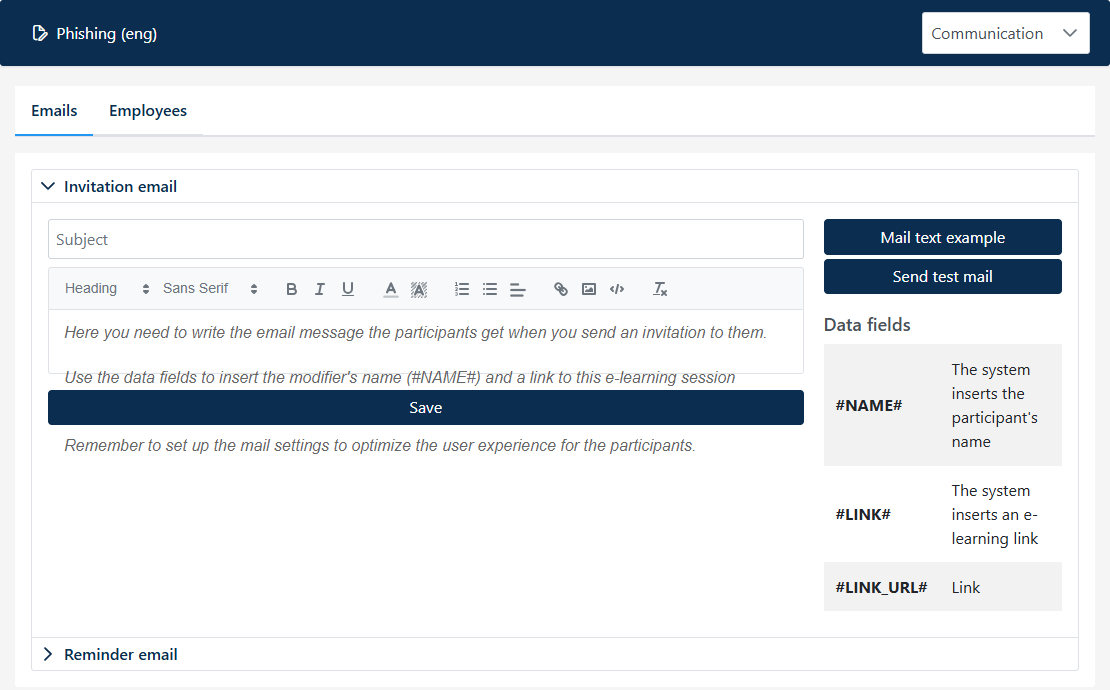
Here you can edit and write the text that is sent out by email to a participant who needs to answer an e-learning.
Employees
To access the overview of employees, you must, as with e-mails, click on “communication” (1).

1. Communication
-By clicking here, you will get to the overview of setting up mail regarding the individual e-learning. Click on ‘employees’ to access the overview of these.
The overview of employees may look like this:
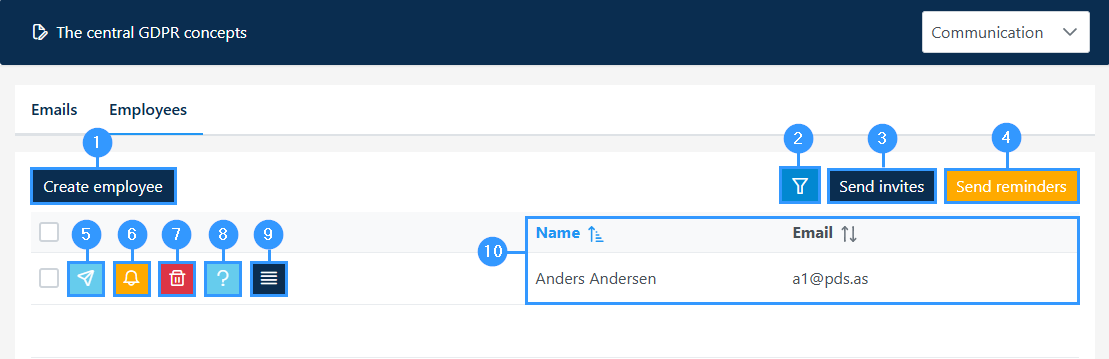
1 Create a new employee
-By clicking here, a formula opens where you must fill in name, email, language, identification and whether the employee should receive weekly status emails.
2. Ȳ-funnel
-Here you can filter a search by language, department, unit and status.
3. Send invites
-Here you can send out invitations to the e-learning in question. By clicking here, e-learning is sent out to all the employees who are registered in the overview for the individual e-learning.
4. Send reminders
-Here you can send out reminders to the e-learning in question. By clicking here, the reminder is sent out to all employees who have received an invitation to the e-learning.
5. Invite
By clicking here, you send an invitation to the e-learning to the individual employee.
6. Reminder
-Here you can click if you have sent an invitation to the employee, and you want to send a reminder.
7. Delete
-Here you can delete the response from the employee.
8. ?-icon // results
-Here you will be able to see results for the individual employee if the employee has answered the e-learning.
9. Log activity
-This is a log of the employee in relation to the e-learning. By clicking here, you can, for example, see when you have invited the employee.
10. Overview
-In this overview, you can see the information about the individual employee.
Results
To get to an overview of the results of an e-learning, click on “reports” (1).
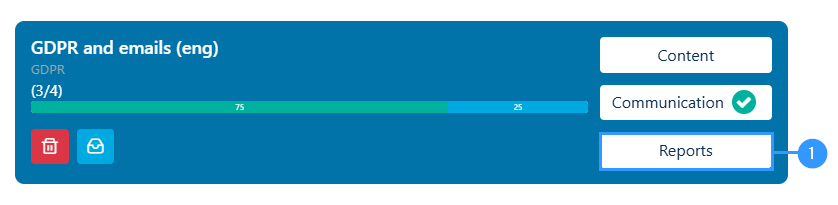
When clicking on “reports” (1) you will be directed to a page with an overview that may look like this:
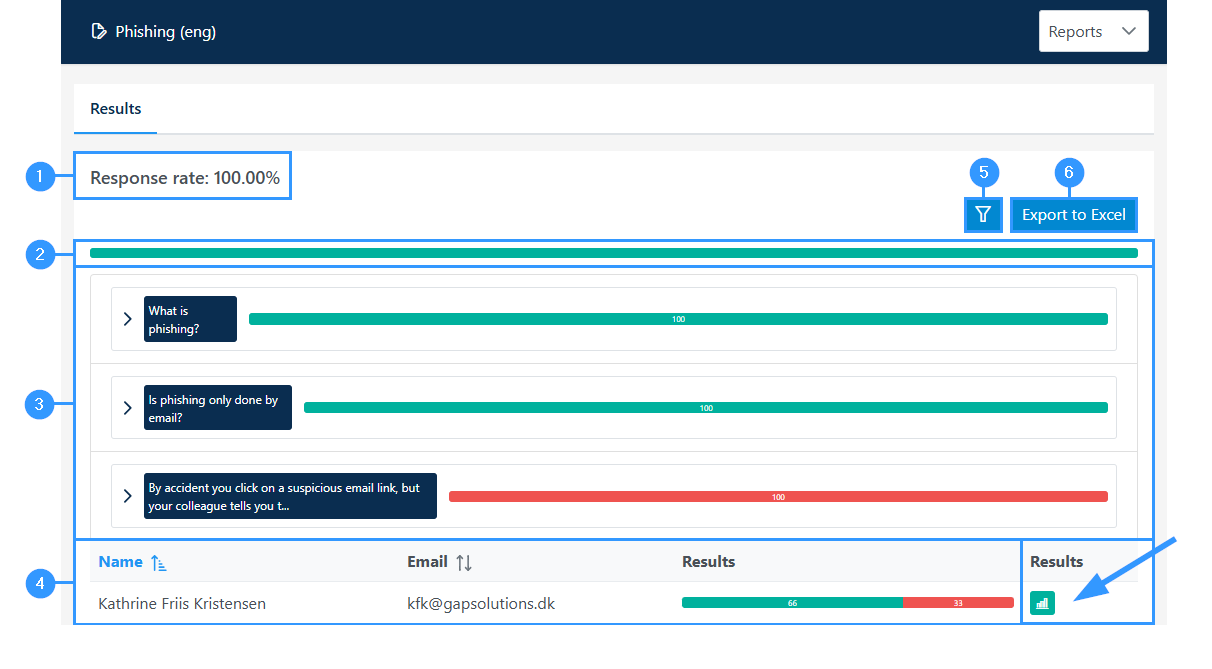
1. Response rate:
-Here you can see in percentage terms how many of the invitees have answered the e-learning in question. This figure is linked to the bar in point 4, which visualises how many people have answered.
2. Color bar:
-This bar is linked to the percentage response in point (1). If there is no answer or if answers are missing, these will appear as a red part of the bar. The green part shows the proportion of invitees who have answered the individual e-learning.
3. Overview
-Here you can see an overview of all questions. You can read the individual question and you can see the distribution of right and wrong answers.
Green is an expression of correct answers and red is an expression of incorrect answers.
4. Results
-This bar shows the result for the individual employee. Red is an expression of incorrect answer and green is an expression of a correct answer. To be able to see the answer in more detail, you can click on the small green box to the right of the bar, where you will open a summary of each question and see what the participant has answered in each question.
5. Ȳ-funnel
-By clicking on this icon, you will be able to search for departments and units
6. Export to Excel
-Here you can export the results to Excel.
Adresse
GapSolutions A/S
Uraniavej 6
DK-8700 Horsens
CVR
CVR-nr. 38582356
Telefon
Salg & administration
(+45) 8844 0808
Helpline & konsulenter
(+45) 2199 0808
E-mail
Kontakt@gapsolutions.dk
Support@gapsolutions.dk
Vi bruger udelukkende tekniske cookies på vores hjemmeside. For yderligere information se vores Cookiepolitik.
Vi er ISO 27001-certificeret og ISAE 3000-auditeret.