
Documentation
In the documentation module, the different areas in which there are elements of documentation are addressed. When you click on documentation in the menu bar on the left side, you will get the following options:
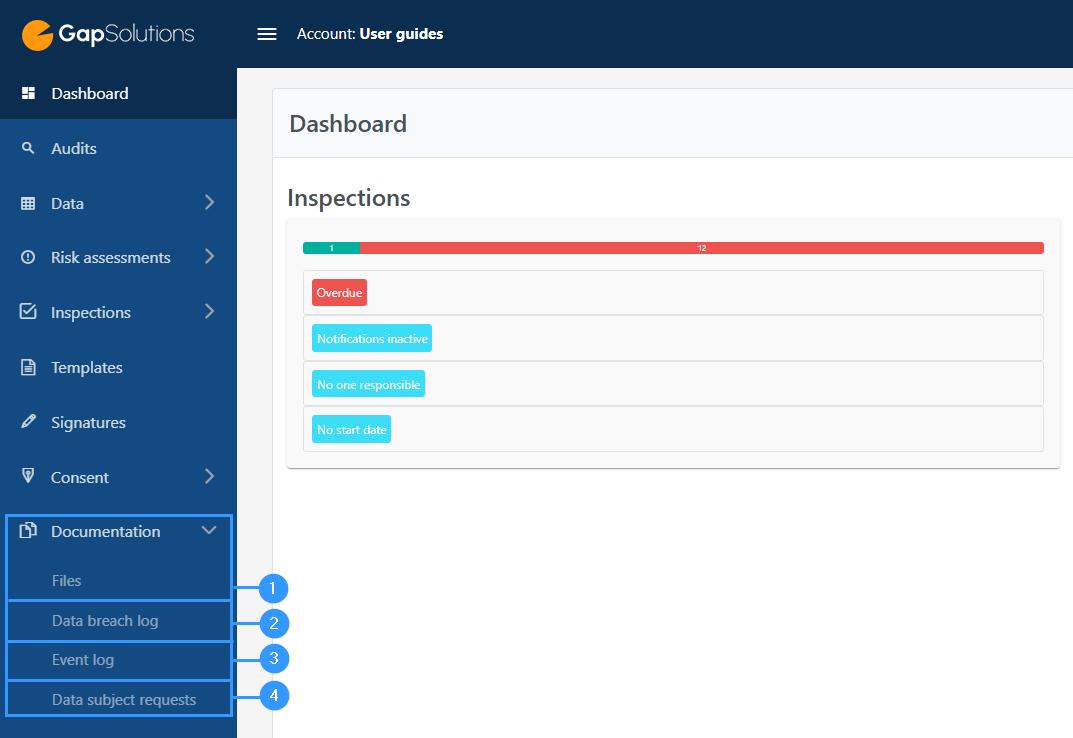
1. Files
-Files are used for basic file management and for sending, read and approve requests.
2. Data breach log
-Security breach log is a log with an overview of the security breaches that have occurred and how these have been addressed.
3. Eventlog
-??? Spørg Sune. 🙂
4. Data subject request
-This module contains inquiries from data subjects. Data subjects are the persons around whom the company processes personal data.
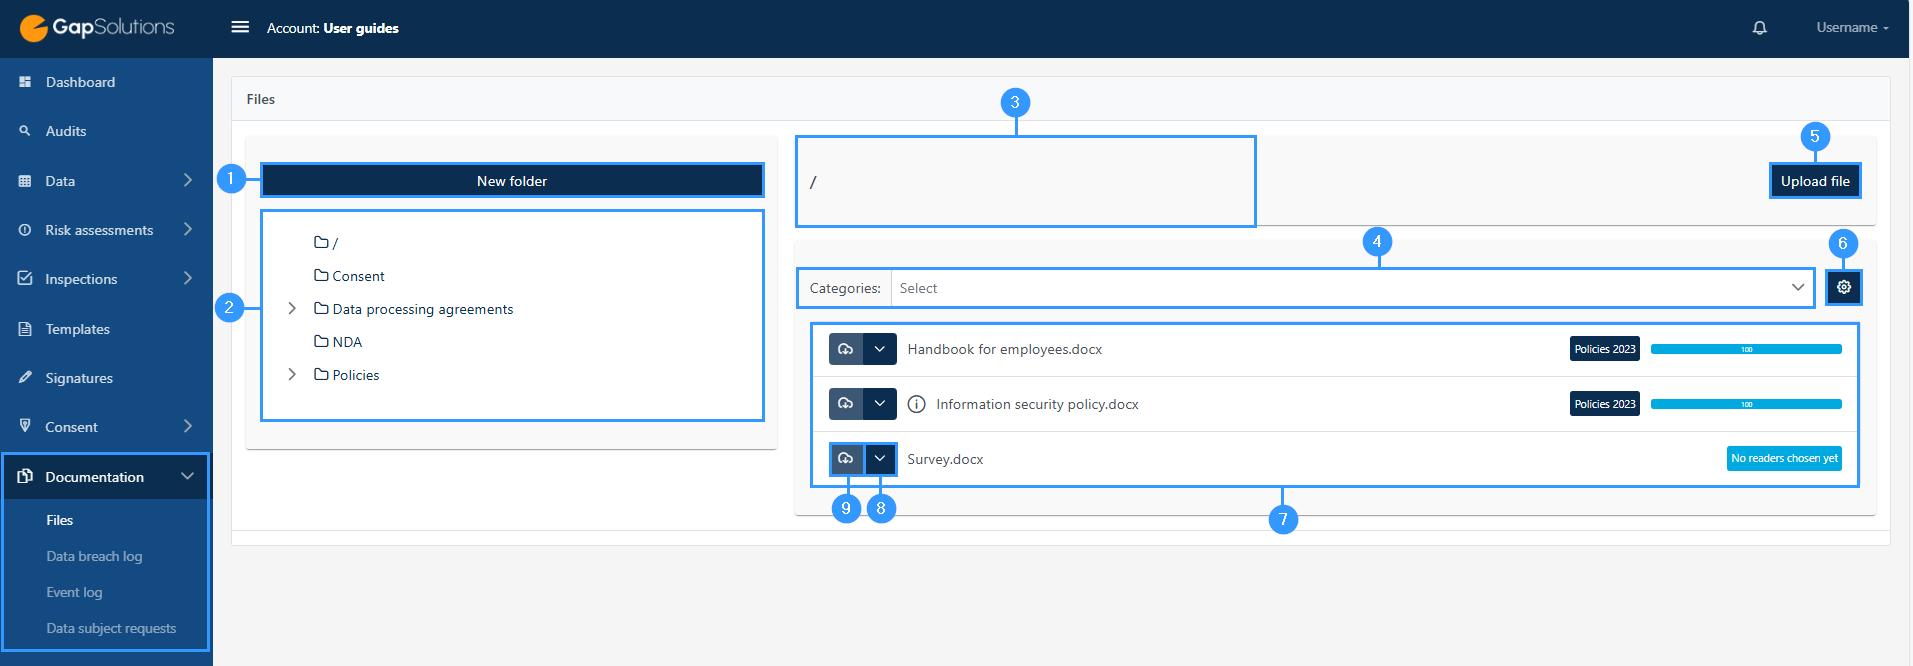
1. New folder
-Create a new folder.
2. Overview of all folders.
-The folder you have clicked on will be light blue in this overview. If there is an arrow next to the folder name, it means that subfolders have been created in the folder.
3. Overview of the specific folder
-In this field you can see the name of the folder from which you view files in section 7.
4. Categories
-If you need to upload a file, you do it by clicking here.
5. Upload file
Here you can sort which files you see in the folder. Clicking on the field will open a menu with different categories.
6. Settings
-When clicking on this icon, you get acces to create, delete, and edit categories.
7. Files
-In this section you can see the files in the folder and get an overview of what the files relate to, as well as the status of the files.
8. Function menu
–
9. Download
-Next to each file, you can open a function menu with: Download latest version, move to…., edit, log, read requests, enable authentication, and delete.
Read more about how to work with the module files here.
Data Breach Log Navigation
To access, create and edit data breach incidents, you must log in to the GDPR portal. Inside the portal, on the left side, you will find a bar where you must click on ‘Documentation’, after which a subbar will open. Here, click on ‘Data Breach Log’ to open the overview of all incidents. The overview is divided into different areas.
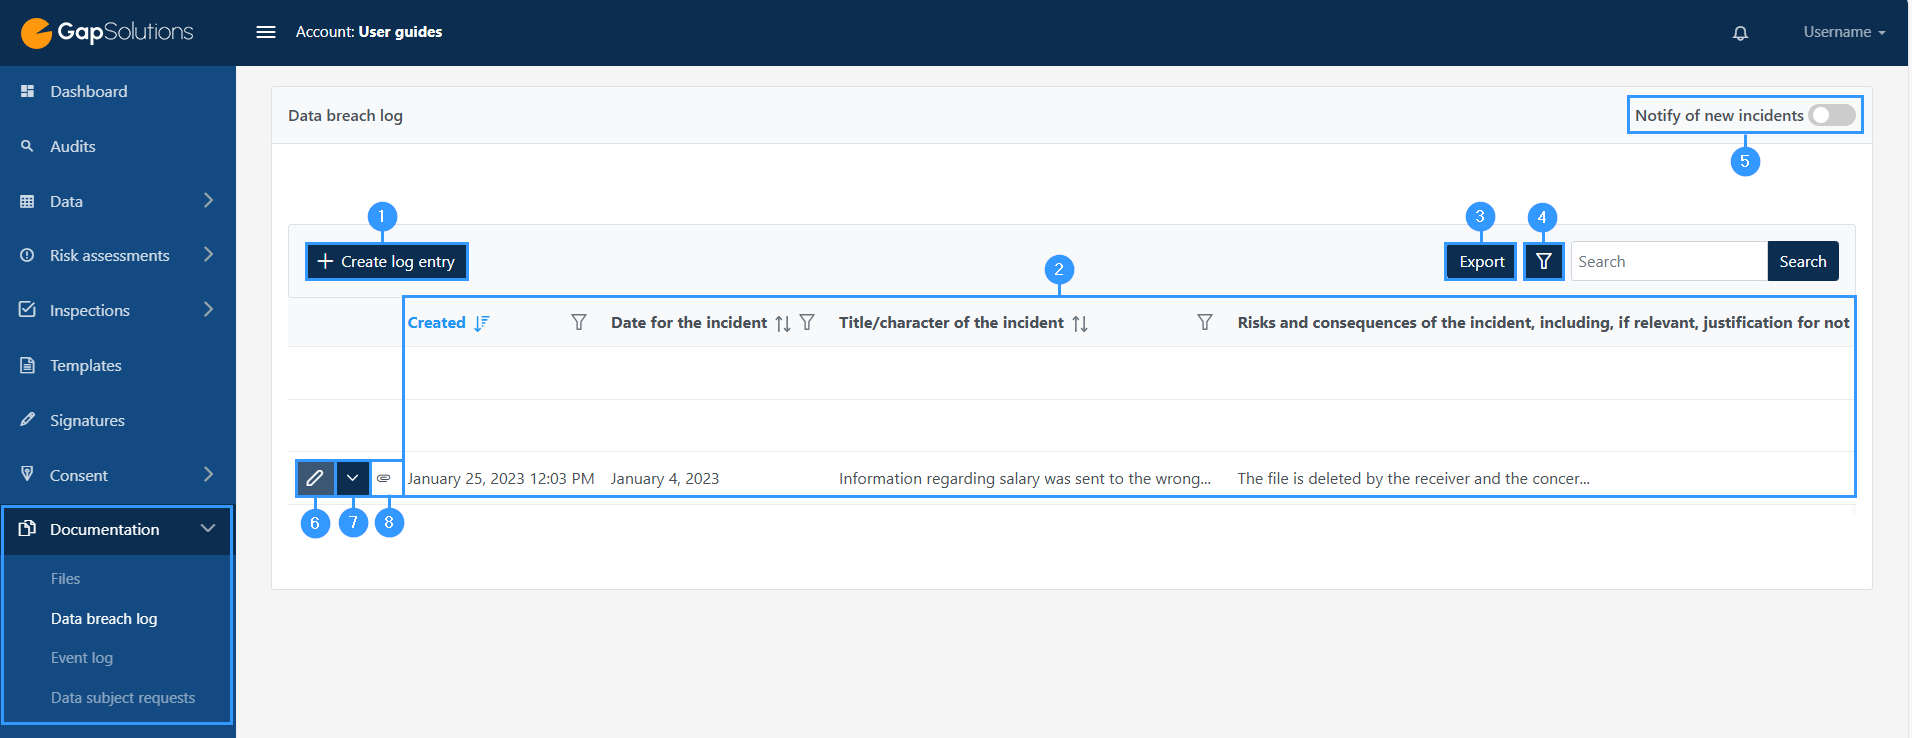
1. Create log entry
-Click here when you want to register a new data breach incident. When clicking on this icon, a form will open where you fill in information regarding the incident.
2. Overview
-Here you have an overview of the individual incident with information about the date and nature of the incident, risk assessment and the consequences of the incident as well as how the damage is limited and whether the incident can be resurrected.
3. Export
-Here you can export incidents. When clicking on the export icon an Excelfile will be downloaded to your computer with the incidents.
4. Ȳ-funnel
-Click on this funnel to enable a search function, in order to search in the different registered data breach incidents.
5. Notify of new incidents
-Turn notifications for new events on or off by clicking the icon.
6. Edit data breach incident
-This will open the same form as when creating the incident, and you will be able to edit what is already typed in.
7. Delete
-Delete incident.
8. Attachment
-If there is an attachment, you can view it here.
Event log
Please notice: Event log
If you have events that you wish to register, but which are not data breaches, these can be documented under the menu item “Event log”, which can be found under “Documentation”. This event log will be structured in the same way as the data breach log, and the navigation will therefore be the same. Read more about ”Event log” here.

1. Create
-Create a request from a data subject.
2. Overview
-Information about the status, type and dates of start, completion, and creation of the request. The status of the request will show a green mark if a completed date is fulfilled in the form. If there is no completed date, a yellow exclamation mark will show. There is room for a note to clarify what the request is about.
3. Ȳ-funnel
-Click on this funnel icon to open search functions. Here you can select the date range and type. You can also search and choose how many requests you want to see per page.
4. Edit
-Edit a request. This will open the same form as when creating the request, and you will be able to edit the form.
5. Delete
-Delete a request.
Adresse
GapSolutions A/S
Uraniavej 6
DK-8700 Horsens
CVR
CVR-nr. 38582356
Telefon
Salg & administration
(+45) 8844 0808
Helpline & konsulenter
(+45) 2199 0808
E-mail
Kontakt@gapsolutions.dk
Support@gapsolutions.dk
Vi bruger udelukkende tekniske cookies på vores hjemmeside. For yderligere information se vores Cookiepolitik.
Vi er ISO 27001-certificeret og ISAE 3000-auditeret.