
Employees
This module in the portal is used to provide an overview of all inquiries sent to users outside the portal.
The starting point is that it should be used to send documents for reading, invitations to e-learning and reminders of inspections to the organization’s employees, but external persons can also be created in this section, and the list will therefore not necessarily reflect the company’s employees.
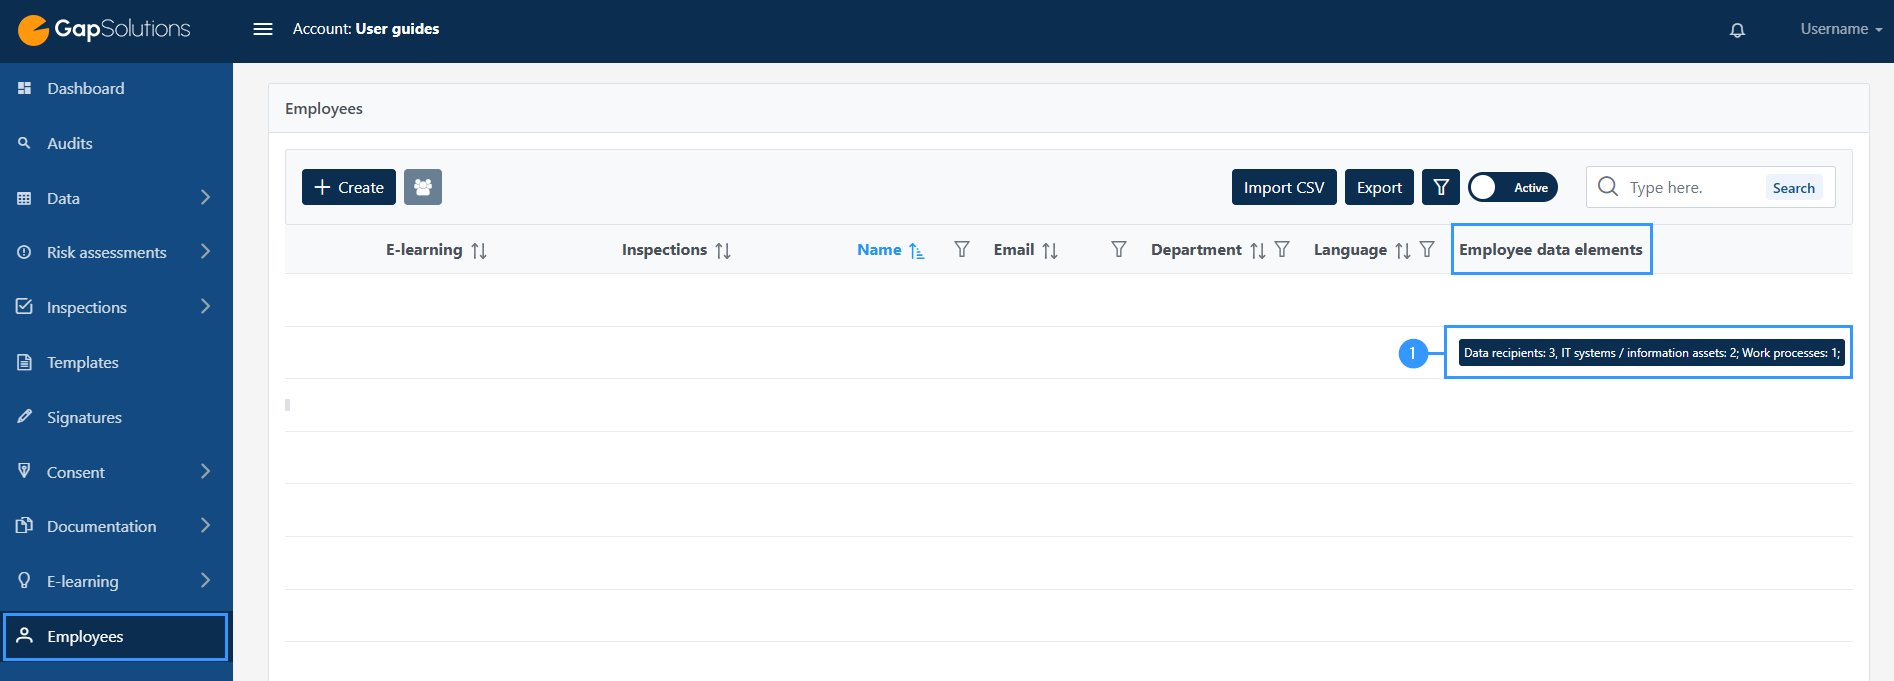
When you click on the menu item “Employees” in the menu bar on the left side, you will see an overview that could look like this:
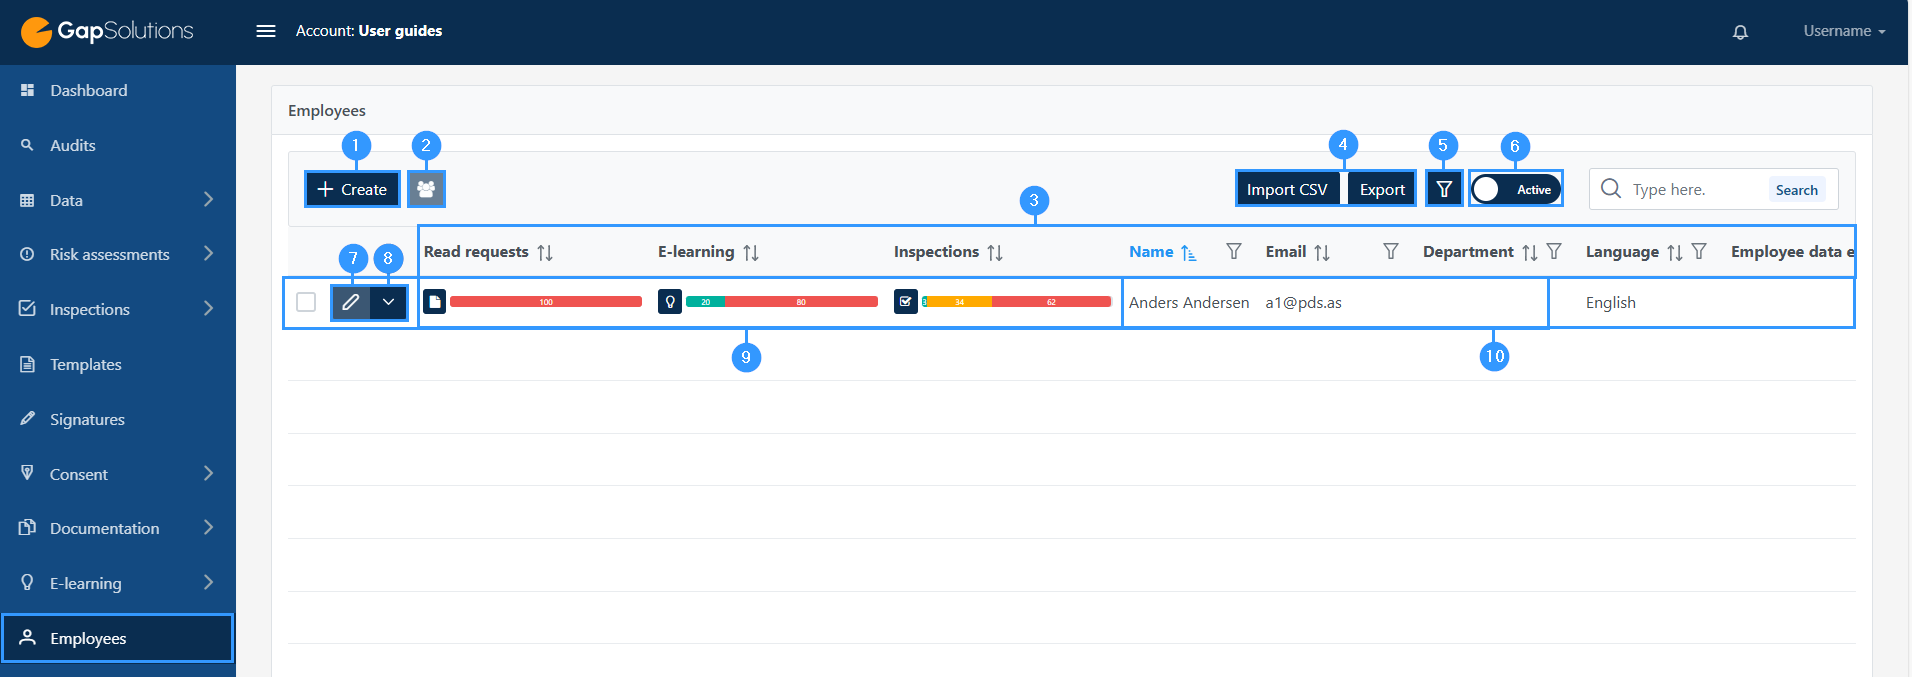
1. Create
–Clicking here will open a window in which you need to specify: name, email, language and identification. Here you can also choose whether the person in question should receive weekly status emails.
2. Assign to employees
-It is possible to assign data elements directly from the overview of employees. For example, this feature might be relevant in cases where data elements need to be assigned to multiple employees or multiple data elements need to be assigned at once.
3. Overview
-These columns are set to be shown by default, but might not be exactly the same, as you can set these from item (5) as described below. It is possible to sort, filter and move the columns around.The table is set the same way as all the tables regarding data, and you can read more about how to use the functions here.
4. Import/export
-From these icons you can import CSV and export the employee overview. When exporting the overview an Excel-file will be downloaded to your computer.
5. Ȳ-funnel
-Here you can choose which columns you want to appear in your overview. When you click here, many fields open that you can click on or off, depending on whether you want it to appear in the overview.
6. Active/archived
-This toggle icon makes it possible to switch between active and archived employees. The default setting will be set on active employees.
7. Edit employee
-When clicking on this icon, you will be able to edit the employee. This will open the same form as when creating the employee.
8. Export/Archive/Delete
-Here you can export, archive or delete a data request
9. Overview of individual employee
-Here you get an overview of the individual employee. Read requests, E-learning, and Inspections will show as red if not done yet and overdue, yellow if ongoing and green if done.
10. Main information
-Here you can see the information you have filled in regarding the individual employee.
Create an employee
When you click on “Create” the following form will open:
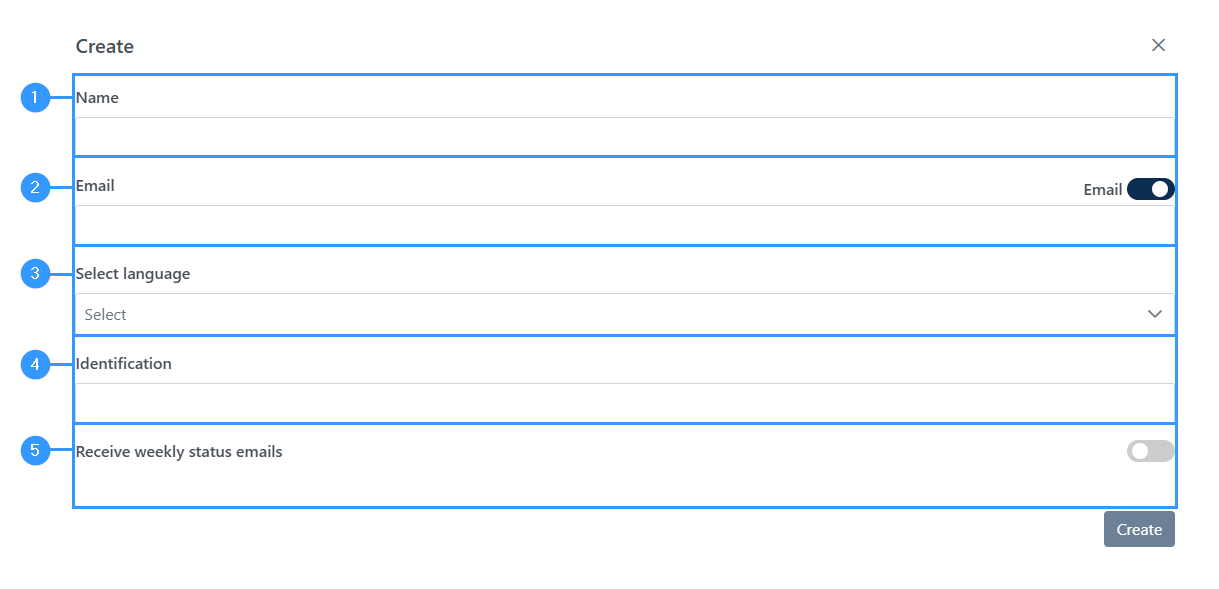
All fields besides email and language are optional, so you can choose what information you want to use to identify the individual employee.
1. Name
-This can be name, initials, or personnel number.
2. Email
-The email is used to send notifications about the various actions (such as read requests) to the employee.
3. Language
-The function is used to determine the language version of emails sent to the employee.
4. Identification
-Here you can write everything you need to identify a specific employee. This can e.g. be department, personnel number, location, site number, title or organization ID.
5. Receive weekly status emails
-If this feature is enabled, the employee will receive a status email every Monday with all the tasks the employee has. If the employee has completed all tasks, no e-mail will be sent.
Creating an employee without an Email
It is possible to create an employee without an Email. You do this by clicking on the icon “Email” to the right in item 2 in the image above. This will switch the field from an Email field to an Pin code field. The employee will get the pin code along with a link, and will be able to log in to the employee dashboard without an Email. The portal will not be able to notify the employee of new reading requests among other things, as there is not submitted an email.
Assigning to employees directly from the element “Employees”
It is possible to assign data elements directly from the overview of employees. For example, this feature might be relevant in cases where data elements need to be assigned to multiple employees or multiple data elements need to be assigned at once.
Below you will see a guide on how to assign data items directly from the employee overview. The guide is divided into a step-by-step walkthrough:
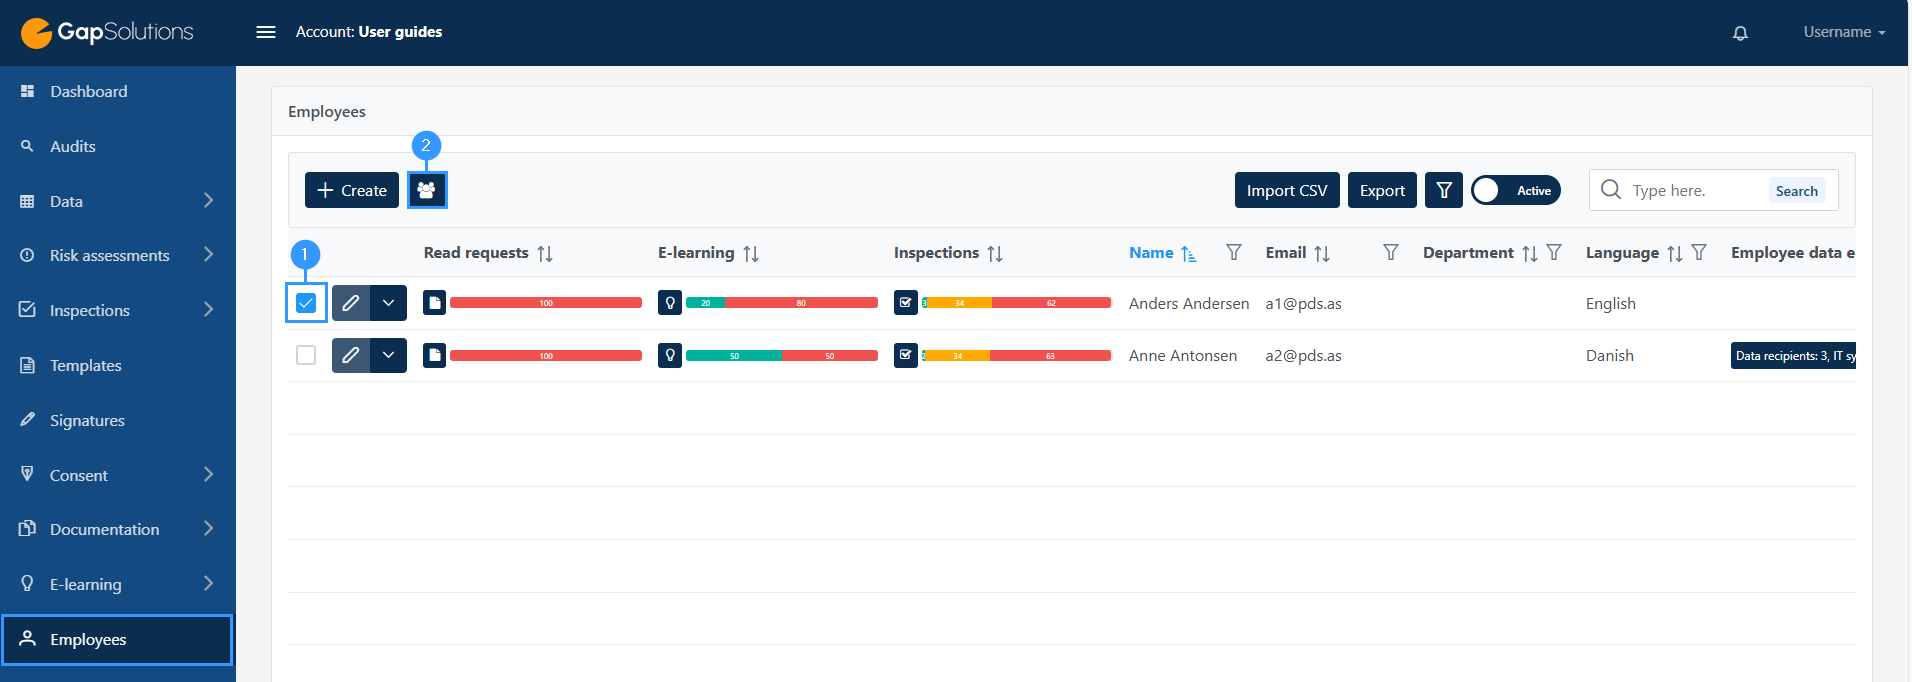
1. Employee
-To access the function of assigning data elements to employees, click here. This causes the icon (2) to become active.
2. Assigning data elements
Once you have selected the employees you want to assign to, click here. This will open a window that may look like this:
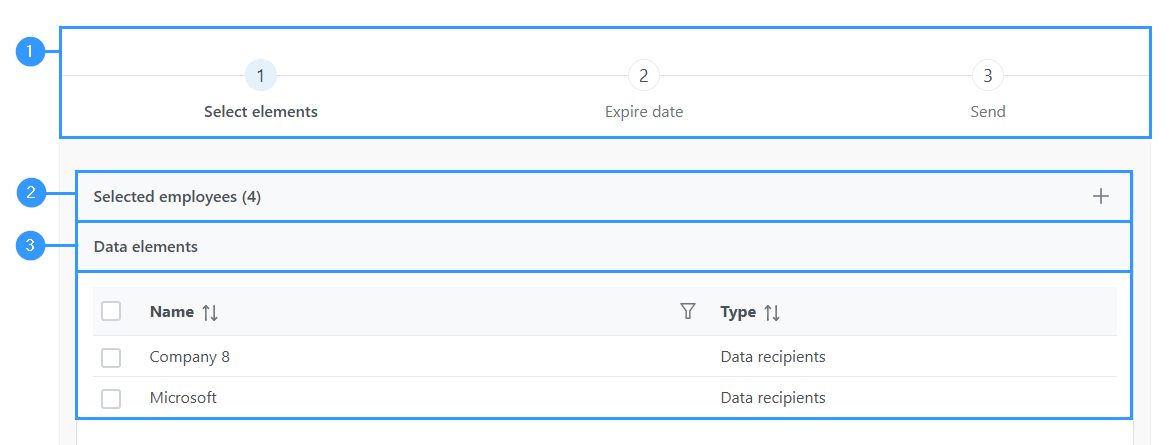
1. Overview
-Here you can see the three steps you need to go through. When you click on the assigning icon, which is point 4 in the previous image, you will always start by having to choose which data elements you want to assign. Next, you need to choose an expiration date and finally you will come to a page where you send the selected data elements to the employees you have chosen to assign to.
2. Selected employees
-Here’s a summary of the employees you’re assigning data elements to. By clicking on this bar, you will be able to see the names of the different employees selected.
Next to each employee there will be a box, as shown in the picture.
You must click next to the employees to whom you want to assign data elements. Once you have selected an employee, the field will turn blue with a check mark.
3. Data elements
-This is a list of the different data elements. To assign data elements, click the small square to the left of each data element. If you click the top box, you choose to assign all data elements. You will be able to see which data elements you have selected by the small square next to each data element turning blue with a check mark.
Once you have selected the data elements you want to assign, you will be able to scroll down to the bottom of the window, where in the right corner you can click on an arrow, after which you can select the expiration date. It will look like this:
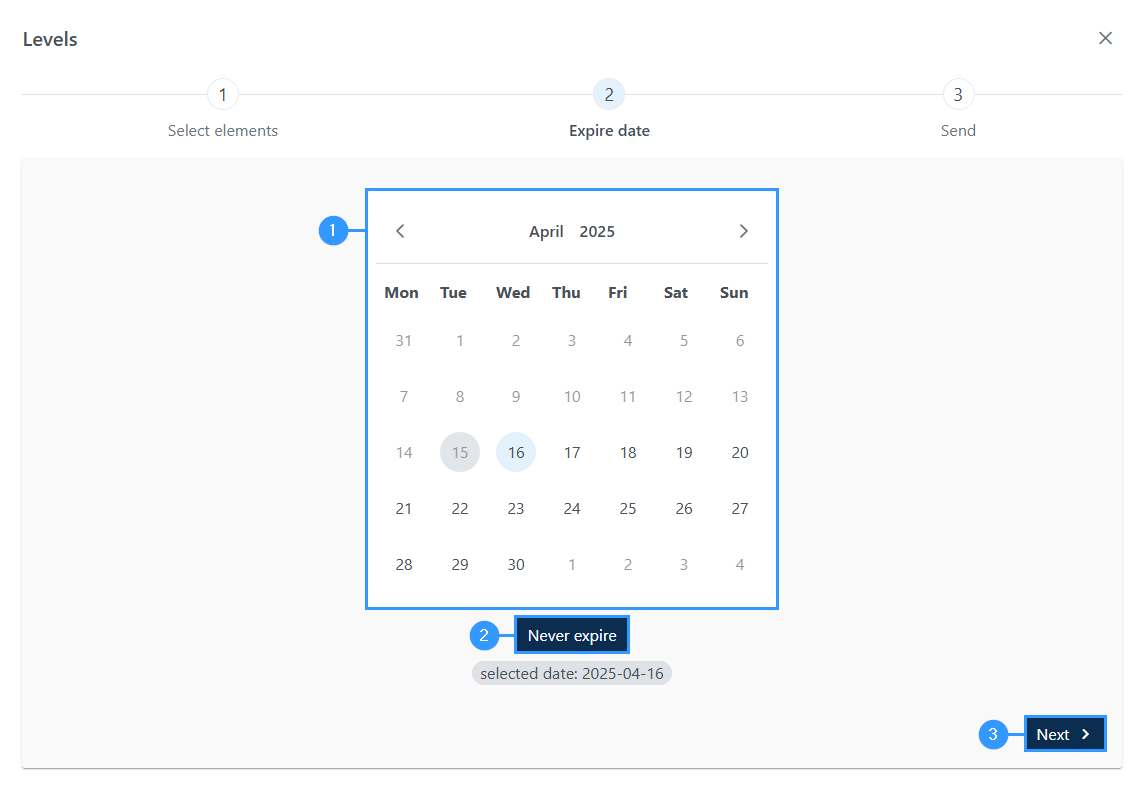
1. Calendar
-Here you have a calendar overview where you can click through to the specific expiration date that you want to choose.
2. Never expire
-If you do not want the assignment of data elements to expire, click here. In this case, the system will create an expiration date that is set 100 years forward.
3. Next
-Once you have selected the expiration date, click here to get to the final page of the window.
Finally, you will be able to see a summary of your selections before the assignment is sent out to employees. This page could look like this:
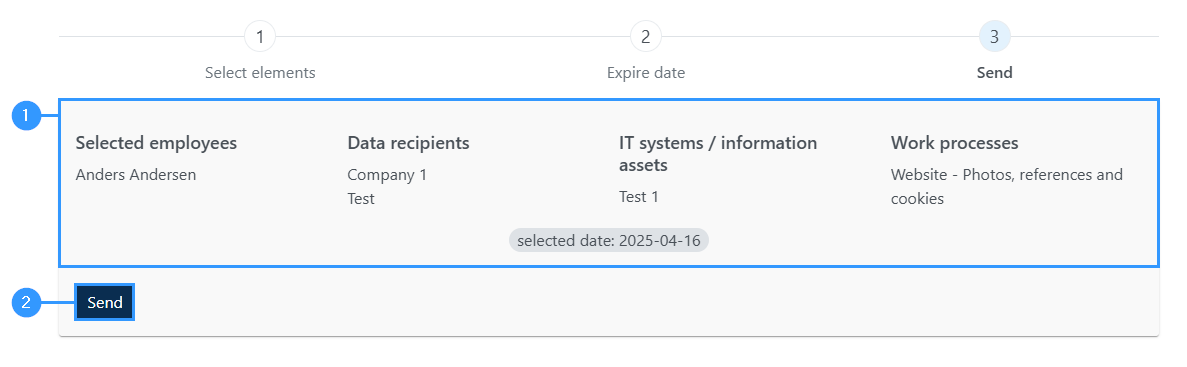
1. Overview
-Here you can see an overview of which employees you have selected and which data elements you want to assign. Please note that all employees selected, will be assigned all data elements selected.
2. Send
-When you want to send the assignment out to the employees, click here.
Employee data elements
In the column “Employee data elements” on the far right of the overview on the Dashboard, it is possible to get an overview of which data elements the individual employee is assigned. When you click on the icon in one of the employees’ columns (1), you will open a window that might look like this:
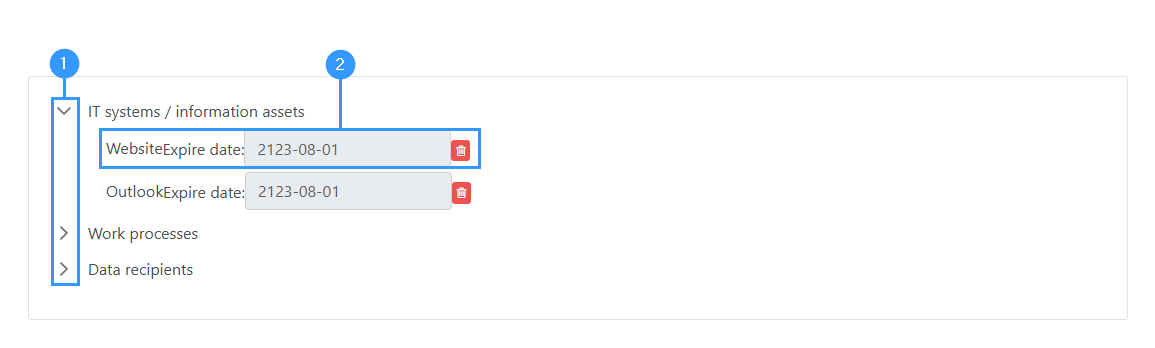
1. IT systems / information assets
-When the overview opens, you will simply be able to see the different headings for the data elements assigned to the employee. By clicking on the small arrow to the left of the header, you will open more information about which data elements are assigned.
2. Expire date
-Here you can see when the assignment expires, which is the date when the employee can no longer edit. It is possible to edit this, by clicking on the date and choosing a new one. It is also possible to delete the assignment by clicking on the red icon.
Overview of each employee; Read requests, E-learning and Inspections
It is possible to get an overview of the status of the individual employee’s tasks, which have been sent out through the portal.
The overview looks like this:
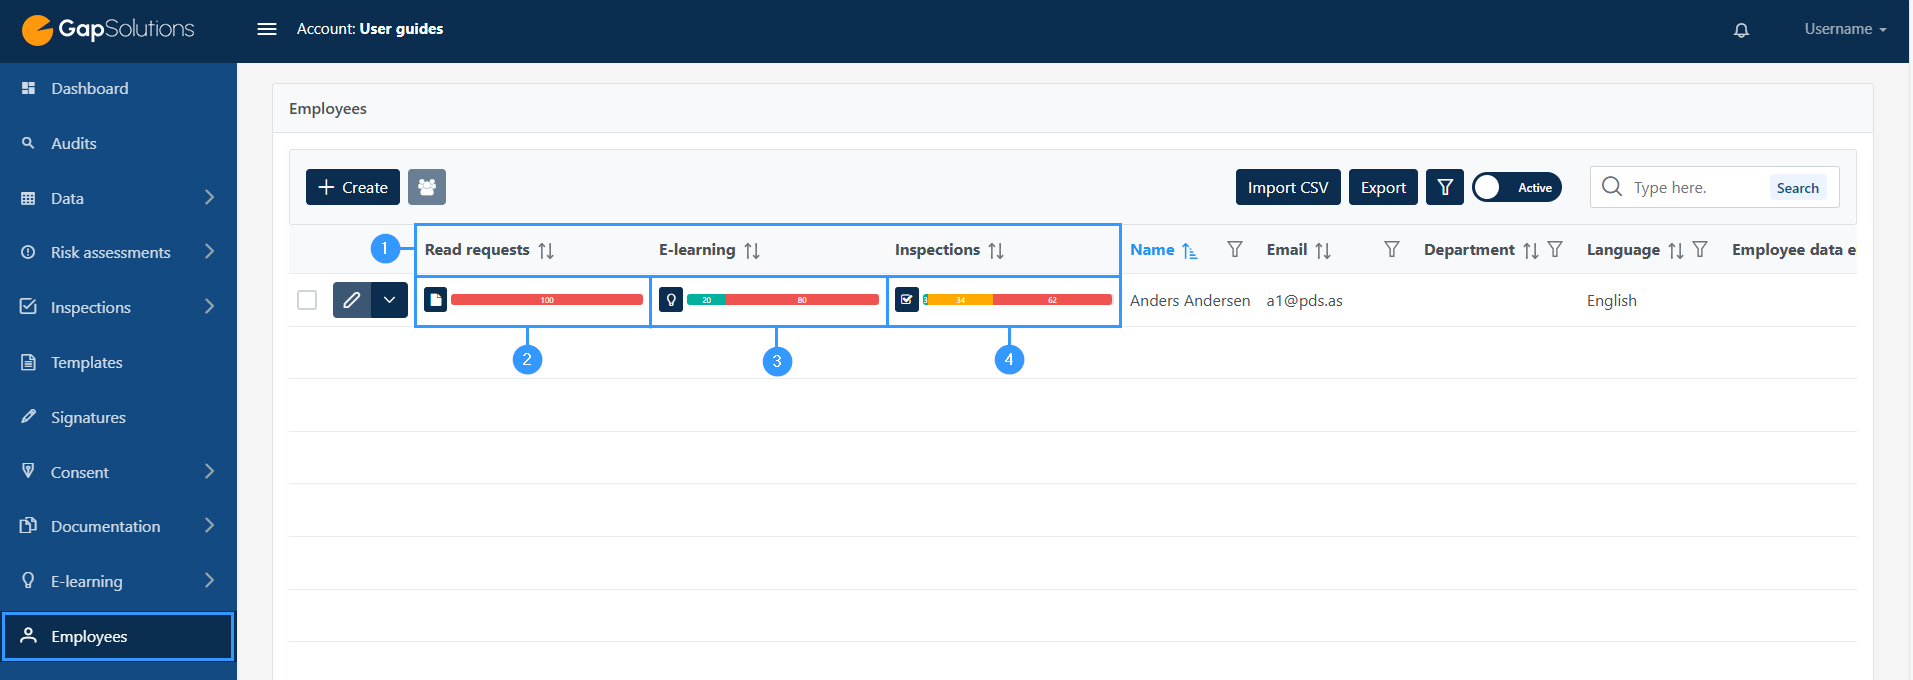
1. Overview
-These three columns are expressions of the different types of elements that can be sent out as tasks to the employee through the portal.
2. Read requests
-Here you can see the status of the individual employee’s reading requests.
Red indicates that a read request has not been completed. Green indicates that it has.
If you want to get more insight into which read requests have been sent to the individual employee, you can click on the dark blue icon with a sheet.This will open a window where you can see the name of the file sent and the status of each read request. It is possible to send a reminder, delete a reading request and gain more insight into the time of sending the reading request as well as any reminders. You can also create a read request directly from this window by clicking on the “add reading request” icon which will be in the upper left corner of the window that opens.
3. E-learning
-This overview shows the status of e-learnings that has been sent out. As with read requests, the colors in the bar indicate whether a e-learning has been completed or not. By clicking on the dark blue icon with a light bulb to the left of the bar, you can open a closer insight into the e-learning. Here it will be possible to see which e-learning has been completed, get a closer insight into the results of the individual e-learnings that have been completed and send out reminders to complete an e-learning.
4. Inspections
-The last type of elements that can be sent out as a task to the employee are inspections.
Here, the bar will show red when there are inspections that are overdue, green when there are inspections that have been carried out, and yellow when there are inspections that are ongoing.
By clicking on the dark blue icon to the left of the bar with a check mark, you can open a closer overview of the individual employee’s inspections.
The window that opens, by clicking here, gives an overview of all inspections and their status. In addition, it is possible to open the individual inspections, delete and assign new inspections to employees.
Adresse
GapSolutions A/S
Uraniavej 6
DK-8700 Horsens
CVR
CVR-nr. 38582356
Telefon
Salg & administration
(+45) 8844 0808
Helpline & konsulenter
(+45) 2199 0808
E-mail
Kontakt@gapsolutions.dk
Support@gapsolutions.dk
Vi bruger udelukkende tekniske cookies på vores hjemmeside. For yderligere information se vores Cookiepolitik.
Vi er ISO 27001-certificeret og ISAE 3000-auditeret.